Posts Tagged ‘Counter-Strike: Global Offensive’

Today’s post will be a very simple and short one, in which I will teach you how to add water into your CS:GO level. I will also post images of the different water textures provided with the hammer editor.

Water

Lets Start first be creating a brush that will have the No Draw texture applied to it. So select the browse button front the right side of the hammer editor to open up the Textures window. Filter for ‘nodraw’ and double click the texture to select it. You should have this;

nodraw

Then create a brush by selecting the Block Tools to create a template of the brush. Right click and select create object, or press Enter. Resize and reposition if required until you have something like this;

nodraw2

Then I recommend adding brushes around the nodraw texture (which will be our water) to make it a tub. These brushes should have a different texture (your choice) and higher that the nodraw texture. Like so;

nodraw3

Now we come to turning the no draw brush into water. To do this open the Face Edit Sheet window by selecting the Toggle Texture or Shift + A. Select the browse button to open up the textures window, and filter for ‘water’. Select one of the textures that are within the red rectangle. (ones that have dev/ or liquid/)

water

One you have one selected right click on the upper surface to apply.

water3

Compile and run the game to see the effect.

Different Waters in-game

dev/dev_water2

2014-01-30_00001

dev/dev_water2_cheap

2014-01-30_00002

dev/dev_water3

2014-01-30_00003

dev/dev_water3_beneath

2014-01-30_00004

dev/dev_water3_exp

2014-01-30_00005

dev/dev_water4

2014-01-30_00006

dev/dev_water5

2014-01-30_00007

dev/dev_waterbeneath2

2014-01-30_00008

liquid/aztecwater

2014-01-30_00009

liquid/bathhouse_water

2014-01-30_00010

liquid/inferno_water

2014-01-30_00011

liquid/shack_water

2014-01-30_00012

water_lod_control

When using water in the level, it is required to add a water_lod_control entity. water_lod_control is a point entity. It is used to control the level of detail behaviour of any water in the map.

To add this, select the Entity Tool or Shift + E. Then filter for ‘water_lod_control’. Left click on the water to add it. Reposition it so that half of the entity is within the water. Finished, compile and run the game.

In this post I will teach you how to add a weather effects into CS:GO maps. Its is very simple to do, but it does require some knowledge of how they would turn out in-game.

To add weather we will need to create a brush, which will have trigger texture applied to it. So first we select the trigger texture by selecting the Browse button located in the right side of the Hammer Editor. A Textures window will pop up, filter for ‘trigger’. Double click the texture to select it.

buy1

Create a brush by selecting the Block Tools or Shift + B. Left click and great template covering the area where you want the brush to be. Reposition the brush if required by dragging the brush with the mouse. Once you have in the correct spot right click and select Create Object (or Hit Enter).

weather1

Now what we need to do is tie the brush to entity. We do this by selecting the entity and hit Crtl+T, which will open the Object Properties. We need to change the class from ‘func_detail’ to ‘func_precipitation’. Then hit apply to set it.

weather2

Now that you have done that we are able to select the weather required. func_precipitation provides few different precipitation types.

weather3

Particle Rain will provide you with what is says Rain. (Unfortunately Rain does not work for unidentified reason so select Particle Rain if you plan to add any rain to your level)

2014-01-23_00005

Snowfall and Particle Snow will provide you with snow. You can select either, the only difference is that Particle Snow falls faster and more dense . (Snow also does not work for unidentified reason)

Snowfall

2014-01-23_00001

Particle Snow

2014-01-23_00003


Ash will provide you with ash fall. (Not sure if you can see in the image but it does work)

2014-01-23_00008


Then you have Particle Rainstorm. Unfortunately rainstorm only work in the area where is covered by the brush, no so if you standing outside the area.

Outside Area

2014-01-23_00007

Inside Area

2014-01-23_00006


Extra

There is things to know when adding weather into the game, example how they would react with other brushes. So I have decided to make small building and test them out.

weather6


What I have found out is that Particle Rain is blocked by other brushes/walls compared to Snowfall, Particle Snow, Ash and Rainstorm, as they just pass through.

Rain

2014-01-24_00003

Snow

2014-01-24_00002

Ash

2014-01-24_00001


So if you do not want snow or ash to pass through then I would recommend splitting the precipitation brush into smaller brush that would surround the building. Like so;

weather 7


In this post I will teach you how to add different set of doors. Doors do require some in-game testing so you can get them right.

CS:GO SDK has two options for doors. Adding doors either by;

  • Models/Props (Using door models that are provided with the game)
  • Tying brushes to a door entity. (If you want a sliding doors or door with particular texture)

Using models is the easiest way of adding doors, just add prop_door_rotating entity. While brushes you will need to tie it to an entity but its more practical.

Adding Doors (Model/Prop)

Select the Entity Tool and search in the object drop down list (located in the bottom right of the hammer editor) for prop_door_rotating. Left-click in the world to add, it should add a purple cube.

door1

Now double click the entity to open the properties window.

door2

Select the World Model field and then click the browse button to open the Model Browser. Filter for ‘door’ and select the appropriate door. In the case of this tutorial I am going to select the doormain01_static.mdl model.

door3

Once you have found a model, hit OK on the model browser and then select apply. The model should display in the world, reposition it if required.

Adding Doors(Brushes)

To do this you will first be required to make a brush. Select a reasonable texture (I’d go with a dev texture) and create a brush that is 2 units wide, 55 units long and 104 units high. (Use prop door model to get the measurements)

door4

Now that you have a brush, you will want to add a door texture. Select Toggle Texture Application or Shift+A to open Face Edit Sheet. Click Browse button to open the textures window. Search for ‘Door’ and select a texture and apply it to the brush by right clicking on the brush surface (align the texture if required by using justify or measurements features) .

door5

Once that is done, we move on to tying the brush to an entity. There are two options;

Normal Rotating Doors – You can tie it to work like normal rotating door by selecting the brush and hitting Crtl+T to open the object properties. Then from the class drop down list search for func_door_rotating, hit apply and you will notice a purple sphere show on the brush/door.

door6

The sphere represents the rotation point of where the door will rotate around. So you are required to move the point(sphere) to the edge of the brush. Use the top viewport to move the sphere.

door7

Sliding Doors – If you want to create a sliding door (e.g elevator door or spaceship door) then you need to Tie the brush to func_door entity. To do that select your brush and hit Ctrl+T. This will open the object properties. Search under the class drop down list for ‘func_door’, once found hit apply.

door8

To make the door slide you will need to set the Move Direction (Pitch Yaw Roll) field. This will require some in-game testing to figure out which direction you want the door to moves when you use action key. You can use measurer located on the top right of properties window to set the direction.

door9

We are  done once you have figured out the direction.

Extra

There are few fields and states that you would like to experiment with when using doors. Here are few:

  • Under Class Info Tab;
    • Parent – The name of this entity’s parent in the movement hierarchy. Entities with parents move with their parent.
    • Speed – The speed at which the door moves.
    • Spawn Position – set if the door is open or closed when it at the start.
    • Unlocked Sound & Locked Sound – Set them to play a sound to give indication if the door is locked or unlocked.
    • Health/Strength – Allows the door to become breakable.
  • Under Flags Tab;
    • Starts Open – This door spawns open.
    • Non-solid to Player – The player does not collide with this door.
    • Passable – Nothing collides with this door.
    • Toggle – The door is given an input to change this door between open and shut.
    • Use Opens and Use closes – The +use key, when in range, triggers this door.
    • NPCs Can’t – NPCs can’t open this door.
    • Touch Opens – When a player or NPC collides with this door, it is triggered.
    • Starts locked – This door spawns locked and cannot be opened by the player or NPC (but buttons can still trigger it)
    • Door Silent – This door makes no noise  (No sound, and does not alert NPCs).
    • Ignore player +USE – Makes the door ignore players +use
    • Start Unbreakable – Makes the door breakable. (Only works on certain prop models and requires door having health/strength)


In this post I will teach you on how to add hostage rescue zones and hostages to your map. Will also add overlay/decal to define the rescue zones to make is easier to identify the area.

Updated hostage rescue rules allow to display only two hostages per map and you will need only one hostage to be rescued.

Adding Hostages

To add a hostage to the game, select the Entity Tool and search through object drop down list (bottom right side of hammer editor) for either;

  • info_hostage_spawn
  • hostage_entity

Both of them look the same and work the same way.

h2

As you are allowed two hostages per map, I recommend adding up to six, with each hostage entity is set at a different position on the map. The game will automatically select two at random when the match starts.

You can add hostages to an exclusion group that will allow you to define which hostage entities you do not want to spawn together. To do this select the hostages what you do not want to spawn together as a group. Open their properties by double clicking on one of the hostages or right click and selecting properties. Then set the Hostage Spawn Exclusion Group set to ‘Do not spawn together’. Here is example from a map that I have made;

h1

Adding Rescue Zone

Now we move on to adding rescue zone to allow CT players to bring hostages back to. Rescue zones are very simple to do.

We start by adding overlay/decal to identify the area where rescue zone will be. This is done by selecting Apply Overlays or Shift + O, then selecting a overlay by clicking the Browse button to open the Textures window. Search for ‘decals/militiahostagerescue

h3

To apply overlay/decal, left click mouse button on floor brush too apply.

Now we move on to the adding the rescue zone. You will need a brush that will have trigger texture applied to it. So start by selecting the trigger texture by selecting Browse button to open the textures window and search for ‘trigger’.

buy1

Now we create the brush by selecting Block Tool and build the brush that covers the rescue zone decal. Here is an example the map that I built:

h4

Tie the rescue zone brush to entity by right clicking and selecting ‘Tie to entity’ or hitting Ctrl+T. This will open up object properties. Under class drop down list search for ‘func_hostage_rescue’ and hit apply.

h5

Finished. Add Counter Terrorist player entity, compile and run the game to test it.

In-game

2014-01-05_00001 2014-01-05_00002 2014-01-05_00003 2014-01-05_00004

In this post I will teach you how to create bomb sites for CS:GO. These sites will be similar to the ones that are on maps that are provided with the game. Maps such as; de_aztec, de_dust and de_inferno.

Each bomb defusal map should hold two bomb sites; A & B. The first site you make will automatically be assigned as bomb size A. The second bombsite will be automatically assigned as bomb site B.

To set the bombsites you will need two brushes that will have the trigger texture and these brushes will also be required to be tied to an entity ‘func_bomb_target’.

So we start by adding overlay/decal to identify the bomb areas on the map. To do this by clicking the Browse button to open the Texture window and we search for reasonable target decal. Here are a few:

  • ‘bombsite_a’ or ‘bombsite_b’
  • ‘bombsite_letter_a’ or ‘bombsite_letter_b’
  • ‘bombsite_x’

After you have selected a decal/overlay, you will now need to place it on a brush.

To add the decal/overlay select the Apply Overlays overlay or Shift+O, then left click on the surface of the brush to apply it.

overlay2

Now we move on to adding the bomb zone brush, to do this we first click on the browse button to open the Texture window. Use filer by typing ‘trigger’ and select the texture that should look like this;

buy1

Once the texture has been selected, you will then need to create a brush. Select the Block Tool and create a brush that covers an area that you would want to be the bomb target.

bombsite1

Once you have done that we then move on to tying the brush to entity. You can do this by right clicking the brush from front,side or top views and select tie to entity, or simply selecting the brush and hitting Ctrl+T.

The brushes object properties will show up. In the Class drop down list search for ‘func_bomb_target’, then hit apply and you are done.

bombsite2

As I said at the start, the game mode will require you to create two bomb sites. You can simply duplicate the existing brush by selecting the brush, and while holding down the left mouse button drag it to the second target zone, then hold down the shift button and release the left mouse button. It should then create a duplicate brush.

bombsite3

Finally just add a terrorist player entity into the level and then compile and run the game to test the bomb sites. The overlay/decal will make it easier to identify the areas in-game.

In this post I will show you how to create spawn points for Counter Terrorist and Terrorist units. I’ll also include creating weapon buy zones for each side. I’ll also show you the best way to run the map.

Spawn Players

There are two ways of adding spawn points into map; either individually or as a bulk (5 players) by using func_instance.

We will start by adding them individually. To do this you will need to select the entity tool or [Shift+E], then filter for either;

  • ‘info_player_terrorist’ for Terrorists (This is set as a default for the entity tool)
  • ‘info_player_counterterrorist’ for Counter Terrorists

In the right bottom side of hammer editor, in the Objects drop down list.

Once you have picked on, then you will need left-click in the textured view somewhere in the word to add the entity. You may need to rotate the player start to make sure that when the player spawns, they will face the direction you want them to. Most maps and modes allow up to five player entities per side/team. You could add more that five but only five will show in-game.

spawn1

Now we go on to adding players in a bulk. Select the entity tool and filter for func_instance’. Once you have added the entity to where you want players to spawn, enter the func_instance entity properties. In VMF Filename field select the Browse button.

spawn2

A dialogue window will pop up and will displaying the contents of the maps folder. There will be folder by name ‘instances’, double click the folder. Within the instances folder there should be two vmf files; spawn_t.vmf and spawn_ct.vmf. Selecting spawn_t will give you five terrorists player entities, while spawn_ct will give give counter terrorists player entities. Select spawn_t.vmf as we already added five CT players. Then click apply.

You will notice that five T players show hovering over func_instance entity. Last things left to do is to rotate the entity to allow the players to face the right direction and make sure that entity is touching the floor of the world.

spawn3

Player Buy Zones

Now we move on to Buy Zones. You will need buy zones for each team to allow players purchase weapons and gear. Buy zones are very simple to set up.

To create a Buy zone you will need to create a brush/block with the ‘trigger’ texture. Select the Block Tools or [Shift+B]. Then select browse from the right side of the editor to open the Textures window. Filter for ‘Trigger’ and select it. Texture should look like this;

buy1

Create block that holds the entity players within the block/brush

buy2

To turn the brushes to buy zones, you need to select one of the brushes and then hit [Ctrl+T] (or right click the brush on side,front or top view and select Tie to entity). A properties window will show;

buy3

Then you need to turn Class to ‘func_buyzone’ and then hit apply.

buy4

Now depending on the brush covering which team, change the field value for Team Number (int) to the team the brush covers. In this case I have selected the brush covering the terrorist team, so I set Team Number (int) to Terrorist.

buy5

Do the same for the other team but have field value to Counter-Terrorist and hit apply.

Running the Map

To start running map, select Run Map counter strike 1.42  located at the top of the hammer editor or hit F9 on your keyboard. A window will open looking like this;

runmap

  • BSP –  BSP tool is the one that actually converts the .vmf file data into a usable .bsp file that the game engine can load.
  • VIS – This tool creates the visibility matrix for the map based on the level’s geometry. This matrix is what determines which polygons the player can see, might see, and can’t see from any given point within the level in game.
  • RAD – The RAD tool, or Radiosity tool, is responsible for generating and applying all lighting effects in a level.

I wont go into different options, just set the setting on Run Map window to be same as shown on the image above. If you run map on these setting, you will need to make sure to add skybox and light_environment before running map.


In-game Images

2013-12-26_00001 

2013-12-26_00002

During the lighting post I did not give tutorial light_dynamic, and did not give tutorial for prop_physics during the prop post. The reason for this is require explaining props and lighting before giving tutorial as require abit of each when it comes to use them in CS:GO SDK. So I’ll give a tutorial on how to add physical ceiling light.

Previous Posts:

Physical Ceiling Light

Entities required are:

  • light_dynamic.
  • prop_physics.
  • phys_ballsocket – It simulates a rigid connection between the centre of its constrained entities and its own location that prevents them from changing relative distance and makes their rotation point its own location.
  • Building (Made up from brushes/walls).
  • (optional) point_spotlight (for effect).

Step 1 – Building a Dark Room

We start by creating a dark room to add our light into to see the effect more clearly. Start by select a texture by selecting browse from the right side of the hammer editor to call the Textures window. Preferred a dark or a grey texture, up to you (I’ll be going with ‘metal/citadel_tilefloor016a’)

darktext

Now move on to the building. Select the Block Tool or [Shift + B] blocktool. Then make sure that Objects drop down list on the bottom right side of hammer editor is set to ‘Block’. Then create four big walls and a roof.

A fast way of making four walls is by duplicate a single wall into four, and turn two of the walls 90 degrees. To duplicate select the object/brush, drag the brush somewhere on the map and while hold shift, release the left mouse button.
duplicate

To turn/rotate the object, right click the object/brush and select Transform and a small window will pop up. Make sure to Mode is set to Rotate and set the Z value to 90 then click OK.

rotate

Then all you have to do is connect together with no gaps and add a roof block. Should look like this from the inside;

building

Step 2 – Adding Physics light model

Select the entity tool, and filter for prop_physics and then left click on the roof block. In the prop entity properties under World Model select Browse button. Filter for ‘light’. While you have the info tab selected look for light model that is compatable with physics.

physics

Once you have found one click OK on the Model Browser. Give the prop entity a name (e.g. light1) and then select apply in the properties. You may need to rearrange the position of the entity to fit the world.

light

Step 3 – Adding a phys_ballsocket 

This is basically a connector, which is connecting physics object to the wall. Select the entity tools and filter in the bottom right side of hammer editor, in the objects drop down list for ‘phys_ballsocket’. Left click on the roof block to add the entity. Then rearrange position to be directly above the physics prop entity. like so;

socket

Then enter phys_ballsocket properties. Then set the Entity 1 field value to equal the physics prop entity name, which you gave (e.g. light1)

ballsocket

Then select Apply.

Step 4 – Adding light_dynamic

Select the entity tool and filter for ‘light_dynamic’, then left click in the world to add the entity. Position it to be set under the light model entity and make sure that centre x marker of light_dynamic entity is not within parameters of the light model entity. Like so:

lightdyn

Once that is done we move on to setting the light_dynamic entity values. Go into its properties by double clicking the entity.

properties

You will need to set the values of:

  • Parent to equal the light model entity (in my example is light1).
  • The inner and outer values to cover more surface area (60 for inner and 75 for outer is good)
  • Brightness (requires some in-game testing to get the best value)
  • Pitch Yawn Roll – 90 0 0 (Facing down)

properties2

Finally you need to set the Maximum Distance to view the affect light. To do this once you have selected the light_dynamic entity, you will notice a yellow circle in the side,front and top views or yellow sphere in the texture view. Select a white square from either the side or front view and stretch it until it inner and outer  emission lights are within the sphere.

maximum distance

Now test it by running the map.

(Optional) Step 5 – Adding point_spotlight

Select the entity tool and filter for point_spotlight. Add it to the world by left clicking and position it in the same position as the light_dynamic entity. Within its properties set these values:

  • Parent – light1.
  • Spotlight length 100, keep the Spotlight With on 50.
  • Pitch Yawn Roll – 90 0 0 (Make sure the spotlight is facing down)

In-game shots

2013-12-19_00001(Light emitting at me after being shot)

2013-12-19_00002(Light going in the other direction)

In this post I will cover props. Props are model entities. I will go though the types of props available in Counter-Strike: Global Offensive-SDK. I will go though how to use them properly within the editor.

There many different types of props available in SDK, these are the types:

  • prop_detailed – Detail geometry – static models that do not move. Do not contain any physics properties or collision data. Cannot break. Do not cast shadows. Can be automatically placed by assigning a detail type to a material. Generally not placed individually by level designers. The least expensive geometry to render. These may not even be rendered on low-end machines. (e.g. grass, rocks and plants)
  • prop_static – Static geometry – models that do not move. Does not contain physics properties other than collision, and cannot break. Cannot have any joints or animation. Casts lightmap shadows. Inexpensive geometry to render. (e.g. pipes, light fixtures, rocks and telephone poles)
  • prop_dynamic – Models that can be placed in hierarchy and can have joints and play animations. Can also be configured to break when taking enough damage. Can be hierarchically attached to other objects. Can cast dynamic shadows. More expensive than static geometry, less expensive than physics geometry. (Used for models that have animation such as Robotic arms etc…)
  • prop_physics – Models with built-in physical properties. Moves and collides using the rigid-body physics system. Can be constrained to other physics objects using hinges or other constraints. It can also be configured to break when it takes enough damage. Casts dynamics shadows. Expensive to move and render. (e.g. barrels, small debris and furniture)
  • prop_ragdoll – Physics props with ragdoll physics skeletons. Have all the properties of physics props and can also use the rigid body ragdoll physics system to have multiple colliding or bending parts. Very expensive to move and render. (e.g. Corpses, multi-piece cardboard boxes and mattresses)
  • prop_physics_multiplayer – Physics props using a simplified physics collision system designed for multiplayer games. Have less networking overhead than standard physics props, necessary for the bandwidth-limited environment of multiplayer games.
  • prop_dynamic_override – Special prop type used to convert a model that is designed to be used as a prop_static, and giving it the properties of a prop_dynamic. Has identical cost of a prop_dynamic.

Inserting Prop Models

To add a prop model, first select the entity tool

Then on the right hand side of the hammer editor, use the objects drop down menu filter for the entity you want to place. Choose either prop_static, prop_physics, prop_physics_multiplayer, prop_dynamic_override, prop_ragdoll or prop_dynamic.

In perspective/Texture viewport, left click to place the entity.Now we will have a place holder for a prop model. Double click on the red entity place holder. In object properties for the model prop, select World Model and click on Browse.

prop

Model Browser will open up, and then you are able to choose a model from the hundreds of models available. Use the filter option to type in a search for specific models you are looking for.prop2

Depending on which prop entity you chose (static, dynamic or physics) click over to Info tab to see if that prop model supports your prop type. (If dynamic it will also support prop_ragdoll, prop_dynamic_override. Else if physics then it will support prop_physics_multiplayer)

prop3

Once you have the model you want, select OK on Model Browser, then Apply on the entity properties.

Hints:

  • If adding physics models, use prop_physics_multiplayer instead of prop_physics.
  • On certain light models its best to use them as prop_dynamic_override instead of prop_static.

Inserting Prop_Dynamic (Animation)

To add animated object first need to search for object that has animation to it. Add an prop_dynamic entity.

In object properties for the model prop, select World Model and click on Browse. In purpose of this tutorial filer for ‘helicopter’. You will notice that under the sequences tab there are few different sequential events.

animationThese events are the animation that mode can perform. So to allow animation on the model need to first select this model then click OK in the Model Browser. As you return to the the models’ properties window search for field Default Animation and set the parameter to equal one of the sequences, like so (I have set it to 3ready):

animation2

Once you have set the Default Animation, then it’s done. Select Apply to finish.

Hint: If a model does have an animation, but the only sequence is idle then set the default animation of the entity to idle.

In this post will go through different types of lights available in the Counter-Strike:Global Offensive-SDK. I’ll also give tutorials on how add some of these lights, show how they work and show how they would look like in-game.

The types of lighting in source sdk can be split up into two:

Static Sources, static lighting is compiled into Lightmaps, which illuminate brushes and models, and Cubemaps, which provide static reflection. Dynamic Sources, dynamic lighting is calculated at runtime, which makes it expensive to render. This includes entity lights:

  • light – A static, omni-directional point light source (e.g. naked light bulb)
  • light_spot – A static, uni-directional point light source (e.g. torch or flashlight).
  • light_environment (Covered this in the last post here: http://goo.gl/VxnKGw )
  • light_directional –  It is a directional light with no falloff.
  • light_dynamic -A simple, uni-directional dynamic light that can be moved, turned, and adjusted.
  • point_spotlight – A dynamic spotlight beam effect, with an optional dynamic light source where it hits a surface.
  • beam_spotlight – Will draw a beam when the player views it side on, and a halo when it’s facing towards the player.

MAT_FULLBRIGHT

If you compile your map and run it in-game, Source will default your lighting to full bright. Once you insert a light into your map, the engine will switch full bright off and begin calculating your lighting. The console command for full bright are:

  • mat_fullbright 0
  • mat_fullbright 1

Mat_Fullbright is a useful command in Source. You can use it to gameplay test your map without worrying about setting up lights. Unfortunately right now, mat_fullbright is buggy and does not produce full bright map.

Adding Light to Map

Enough with the back ground lecture, now I’ll show you how to add certain light entities into your map. I’ll go through these light entities; light, light_spot, point_spotlight and beam_spotlight.

To add light entity first select the entity tool entity tool

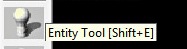
Then type in the bottom right hand side of the hammer editor, under object ‘light’

Then to add the light entity just left click somewhere in the world (Where you would like to place it, just make sure not add it within an existing brush/object)

Hint – The x simple on the entity represents the centre, but can also represent the point of where the light starts emitting. So make sure if you want to light the objects/brushes around do not have x within an object/brush or prop.

light

Double click the entity to display the properties to alter any necessary settings.

lightprop

Useful fields that you need to take into consideration when using light entity:

  • Name – Could give name to the light entity for reference or parenting.
  • Brightness – takes four values, first three (255 255 255) is the colour of the light. The fourth (200) is the brightness of the light.
  •  Appearance –  Is how the light could appear in-game. Normal is constant light emission, Fluorescent flicker is that light will flicker and you will get the rest.

Here is in-game view of light at with different values for fields. (R-L) Standard light, Brightness set at 750, Colour change to blue and final appearance set to flicker (unfortunately unable to view the flicker in action with a screenshot).

2013-12-04_00001

Now we move on to light_spot. This entity only works by emitting light in one direction and it is not as bright as light entity. To add the entity select the entity tools and filter for ‘light_spot’ under objects in the right hand side of the hammer editor.Left-click where you would like to place the entity in the world.

light_spotprop

Useful fields that you need to take into consideration when using light_spot entity:

  • The ones that were included in the light entity properties (Name, brightness and appearance).
  • Pitch Yaw Roll (X Y Z) – The direction of where the light is emitting.
  • Inner (Bright) angle – Focus light.
  • Outer (Fade) angle – Outer fade light.

Here is in-game view of light_spot at with different values for fields. (R-L) Standard light_spot, Brightness set at 750, Colour change to blue and last has its Inner and outer set to 60 and 75 (Notice the light cover more surface area and first one)

2013-12-04_00002

beam_spotlight and point_spotlight are similar so I’ll cover them together (I sometimes forger which does what). Again after selecting the entity tool, filter the object for either ‘beam_spotlight’ or ‘point_spotlight’ (depending on what you need). Left-click on the in the world to add the entity. The arrow should indicate the direction of where the entity will emit.

beam&point

The additional field provided in their properties that will interest you are:

  • Spotlight Length
  • Spotlight Width

I do not need to need explain these, I’m sure you already understand what they point to.

Here is in-game view of beam_spotlight(top) and point_spotlight(bottom). Main and most notisable difference is that point_spotlight is stronger and brighter than beam_spotlight.  (R-L) Standard values, Colour change to red, then I halved the spotlight length and width. The last one is mistake, its the same as standard values.

2013-12-04_00003

I think you have noticed that beam_spotlight and point_spotlight do not provide any light to the environment. They are more than an effect that helps make the map or objects more interesting.

I’ll not show light_directional because there isn’t much use for it, as well as I’m not sure how to set it up, as I never was required to use it. light_dynamic cannot be used alone, and as I haven’t introduced props yet I have decided to save this for a future post.

I originally planned to cover props & lights before I’d go into giving tutorials about adding a skybox, but I decided doing it now would be more helpful for you as it will make the map easier to navigate through.

Skyboxes are solutions intended to make maps look bigger than they are. They are typically used to display the sky, along with distant, unreachable areas and landscapes, such as distant mountains or buildings.

There are two types of skyboxes:

  1. 3D Skybox – It’s a surrounding area constructed by the level designer, outside the bounds of the gameplay area on the map. Players can never reach the 3D skybox.
  2. 2D Skybox – gives the effect of a giant cube surrounding the map used for applying textures in its interior faces. These textures usually consists of the ground meeting the sky in the horizon, clouds, and other distant details.

The 2D skybox for a level is set in the map properties which can be accessed through Map ->Map Properties.

Creating a Skybox

To start create skybox for you map first need to select the right texture. Select Browse to pop up the Textures window, then filter for ‘skybox’ or to be exact ‘tools/toolsskybox’. The selected texture should be like the one highlighted in red square box here:

skybox

Double click it for selection. Then create a block template with your map inside it like so:

Skybox Template

Then right click on the template and select Create Object.

We are not finished. Next need to make the skybox hallow, as the skybox brush has outer surfaces set to the texture. To make the brush hallow right click the brush and select Make Hollow.

Skybox Brush View

(Top-left view is how brush looks from outside. Bottom-left view is from within the brush. Need to make the inside look like outside)

After selecting Make Hollow a dialog box will pop up with text “How thick do you want the walls? Use a negative to hollow outward” and value 32 in the textbox. To make it hollow change the value ’32’ to ‘-32’ and select OK and we are done

Adding light_environment

When using Skybox it is also recommended to add light_environment entity. light_environment  is an internal point entity available in all Source games. It casts parallel directional lighting from the toolsskybox (Skybox) texture to approximate the light cast from the Sun or Moon.

To add a light_environment entity first select the Entity Tool from left side of the hammer editor. It should look like this:

entity tool

Then add ‘light_environment’ to bottom right side of the hammer editor under Objects:

light_env

And then left click somewhere in within the skybox to add the entity, in the middle of the skybox is the best place.

light_env2

Setting Up Skybox and light_environment

Now we move on to setting up skybox in-game texture and setting the appropriate fields for light_environment depending on the skybox texture view.

list of skyboxes that are available for the Counter Strike: Global Offensive can be found here: https://developer.valvesoftware.com/wiki/Counter-Strike:_Global_Offensive_Sky_List

The link provides a preview of skybox texture and values to add to the light_environment fields.  Things to take note of are :

  • Texture name, examples office, jungle, Italy, embassy..
  • Ideal Sun Angle
  • Ideal Sun Pitch
  • Ideal Brightness
  • Ideal Ambience

The other values such as; Ideal Directional Angle, Ideal Directional Pitch and Ideal Directional Brightness are not relevant for light_environment. They are for light_directional which I will cover in another post.

Lets start setting up. For course of the tutorial I’ll be going with;

  • Texture name : Vietnam
  • Ideal Sun Angle : 0 33 0
  • Ideal Sun Pitch : -36
  • Ideal Brightness : 239 228 186 600
  • Ideal Ambience : 199 224 233 350

First we set up the texture, go to map properties by clicking on Map->Map Properties. A pop up window with the heading “Object Properties” will show up:

settingup

Now change the value of the field “Skybox Texture Name” from ‘sky_dust’ to ‘vietnam’. Then click apply.

Skybox texture is now done. We move on to setting up the light_environment. Double click the entity or right click and select properties. This should show up:

settingup2

Now we take the values that I posted above and add them to the appropriate fields. They are given in order so you can just add them in the same order from the top.

  • Ideal Sun Angle – Pitch Yaw Angel : 0 33 0
  • Ideal Sun Pitch – Pitch : -36
  • Ideal Brightness – Brightness : 239 228 186 600
  • Ideal Ambience – Ambient : 199 224 233 350

settingup3

Click apply and you are done.

In-game Screenshot of Skybox and light_environment

2013-11-23_00001

2013-11-23_00002

2013-11-23_00003