In this post I will show you how to create spawn points for Counter Terrorist and Terrorist units. I’ll also include creating weapon buy zones for each side. I’ll also show you the best way to run the map.
Spawn Players
There are two ways of adding spawn points into map; either individually or as a bulk (5 players) by using func_instance.
We will start by adding them individually. To do this you will need to select the entity tool or [Shift+E], then filter for either;
- ‘info_player_terrorist’ for Terrorists (This is set as a default for the entity tool)
- ‘info_player_counterterrorist’ for Counter Terrorists
In the right bottom side of hammer editor, in the Objects drop down list.

Once you have picked on, then you will need left-click in the textured view somewhere in the word to add the entity. You may need to rotate the player start to make sure that when the player spawns, they will face the direction you want them to. Most maps and modes allow up to five player entities per side/team. You could add more that five but only five will show in-game.

Now we go on to adding players in a bulk. Select the entity tool and filter for func_instance’. Once you have added the entity to where you want players to spawn, enter the func_instance entity properties. In VMF Filename field select the Browse button.

A dialogue window will pop up and will displaying the contents of the maps folder. There will be folder by name ‘instances’, double click the folder. Within the instances folder there should be two vmf files; spawn_t.vmf and spawn_ct.vmf. Selecting spawn_t will give you five terrorists player entities, while spawn_ct will give give counter terrorists player entities. Select spawn_t.vmf as we already added five CT players. Then click apply.
You will notice that five T players show hovering over func_instance entity. Last things left to do is to rotate the entity to allow the players to face the right direction and make sure that entity is touching the floor of the world.

Player Buy Zones
Now we move on to Buy Zones. You will need buy zones for each team to allow players purchase weapons and gear. Buy zones are very simple to set up.
To create a Buy zone you will need to create a brush/block with the ‘trigger’ texture. Select the Block Tools or [Shift+B]. Then select browse from the right side of the editor to open the Textures window. Filter for ‘Trigger’ and select it. Texture should look like this;
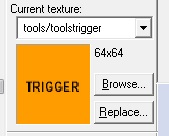
Create block that holds the entity players within the block/brush

To turn the brushes to buy zones, you need to select one of the brushes and then hit [Ctrl+T] (or right click the brush on side,front or top view and select Tie to entity). A properties window will show;

Then you need to turn Class to ‘func_buyzone’ and then hit apply.

Now depending on the brush covering which team, change the field value for Team Number (int) to the team the brush covers. In this case I have selected the brush covering the terrorist team, so I set Team Number (int) to Terrorist.

Do the same for the other team but have field value to Counter-Terrorist and hit apply.
Running the Map
To start running map, select Run Map  located at the top of the hammer editor or hit F9 on your keyboard. A window will open looking like this;

- BSP – BSP tool is the one that actually converts the .vmf file data into a usable .bsp file that the game engine can load.
- VIS – This tool creates the visibility matrix for the map based on the level’s geometry. This matrix is what determines which polygons the player can see, might see, and can’t see from any given point within the level in game.
- RAD – The RAD tool, or Radiosity tool, is responsible for generating and applying all lighting effects in a level.
I wont go into different options, just set the setting on Run Map window to be same as shown on the image above. If you run map on these setting, you will need to make sure to add skybox and light_environment before running map.
In-game Images