Archive for January, 2014

Today’s post will be a very simple and short one, in which I will teach you how to add water into your CS:GO level. I will also post images of the different water textures provided with the hammer editor.

Water

Lets Start first be creating a brush that will have the No Draw texture applied to it. So select the browse button front the right side of the hammer editor to open up the Textures window. Filter for ‘nodraw’ and double click the texture to select it. You should have this;

nodraw

Then create a brush by selecting the Block Tools to create a template of the brush. Right click and select create object, or press Enter. Resize and reposition if required until you have something like this;

nodraw2

Then I recommend adding brushes around the nodraw texture (which will be our water) to make it a tub. These brushes should have a different texture (your choice) and higher that the nodraw texture. Like so;

nodraw3

Now we come to turning the no draw brush into water. To do this open the Face Edit Sheet window by selecting the Toggle Texture or Shift + A. Select the browse button to open up the textures window, and filter for ‘water’. Select one of the textures that are within the red rectangle. (ones that have dev/ or liquid/)

water

One you have one selected right click on the upper surface to apply.

water3

Compile and run the game to see the effect.

Different Waters in-game

dev/dev_water2

2014-01-30_00001

dev/dev_water2_cheap

2014-01-30_00002

dev/dev_water3

2014-01-30_00003

dev/dev_water3_beneath

2014-01-30_00004

dev/dev_water3_exp

2014-01-30_00005

dev/dev_water4

2014-01-30_00006

dev/dev_water5

2014-01-30_00007

dev/dev_waterbeneath2

2014-01-30_00008

liquid/aztecwater

2014-01-30_00009

liquid/bathhouse_water

2014-01-30_00010

liquid/inferno_water

2014-01-30_00011

liquid/shack_water

2014-01-30_00012

water_lod_control

When using water in the level, it is required to add a water_lod_control entity. water_lod_control is a point entity. It is used to control the level of detail behaviour of any water in the map.

To add this, select the Entity Tool or Shift + E. Then filter for ‘water_lod_control’. Left click on the water to add it. Reposition it so that half of the entity is within the water. Finished, compile and run the game.

In this post I will teach you how to add a weather effects into CS:GO maps. Its is very simple to do, but it does require some knowledge of how they would turn out in-game.

To add weather we will need to create a brush, which will have trigger texture applied to it. So first we select the trigger texture by selecting the Browse button located in the right side of the Hammer Editor. A Textures window will pop up, filter for ‘trigger’. Double click the texture to select it.

buy1

Create a brush by selecting the Block Tools or Shift + B. Left click and great template covering the area where you want the brush to be. Reposition the brush if required by dragging the brush with the mouse. Once you have in the correct spot right click and select Create Object (or Hit Enter).

weather1

Now what we need to do is tie the brush to entity. We do this by selecting the entity and hit Crtl+T, which will open the Object Properties. We need to change the class from ‘func_detail’ to ‘func_precipitation’. Then hit apply to set it.

weather2

Now that you have done that we are able to select the weather required. func_precipitation provides few different precipitation types.

weather3

Particle Rain will provide you with what is says Rain. (Unfortunately Rain does not work for unidentified reason so select Particle Rain if you plan to add any rain to your level)

2014-01-23_00005

Snowfall and Particle Snow will provide you with snow. You can select either, the only difference is that Particle Snow falls faster and more dense . (Snow also does not work for unidentified reason)

Snowfall

2014-01-23_00001

Particle Snow

2014-01-23_00003


Ash will provide you with ash fall. (Not sure if you can see in the image but it does work)

2014-01-23_00008


Then you have Particle Rainstorm. Unfortunately rainstorm only work in the area where is covered by the brush, no so if you standing outside the area.

Outside Area

2014-01-23_00007

Inside Area

2014-01-23_00006


Extra

There is things to know when adding weather into the game, example how they would react with other brushes. So I have decided to make small building and test them out.

weather6


What I have found out is that Particle Rain is blocked by other brushes/walls compared to Snowfall, Particle Snow, Ash and Rainstorm, as they just pass through.

Rain

2014-01-24_00003

Snow

2014-01-24_00002

Ash

2014-01-24_00001


So if you do not want snow or ash to pass through then I would recommend splitting the precipitation brush into smaller brush that would surround the building. Like so;

weather 7


In this post I will teach you how to add different set of doors. Doors do require some in-game testing so you can get them right.

CS:GO SDK has two options for doors. Adding doors either by;

  • Models/Props (Using door models that are provided with the game)
  • Tying brushes to a door entity. (If you want a sliding doors or door with particular texture)

Using models is the easiest way of adding doors, just add prop_door_rotating entity. While brushes you will need to tie it to an entity but its more practical.

Adding Doors (Model/Prop)

Select the Entity Tool and search in the object drop down list (located in the bottom right of the hammer editor) for prop_door_rotating. Left-click in the world to add, it should add a purple cube.

door1

Now double click the entity to open the properties window.

door2

Select the World Model field and then click the browse button to open the Model Browser. Filter for ‘door’ and select the appropriate door. In the case of this tutorial I am going to select the doormain01_static.mdl model.

door3

Once you have found a model, hit OK on the model browser and then select apply. The model should display in the world, reposition it if required.

Adding Doors(Brushes)

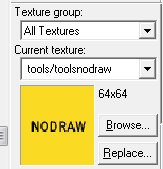
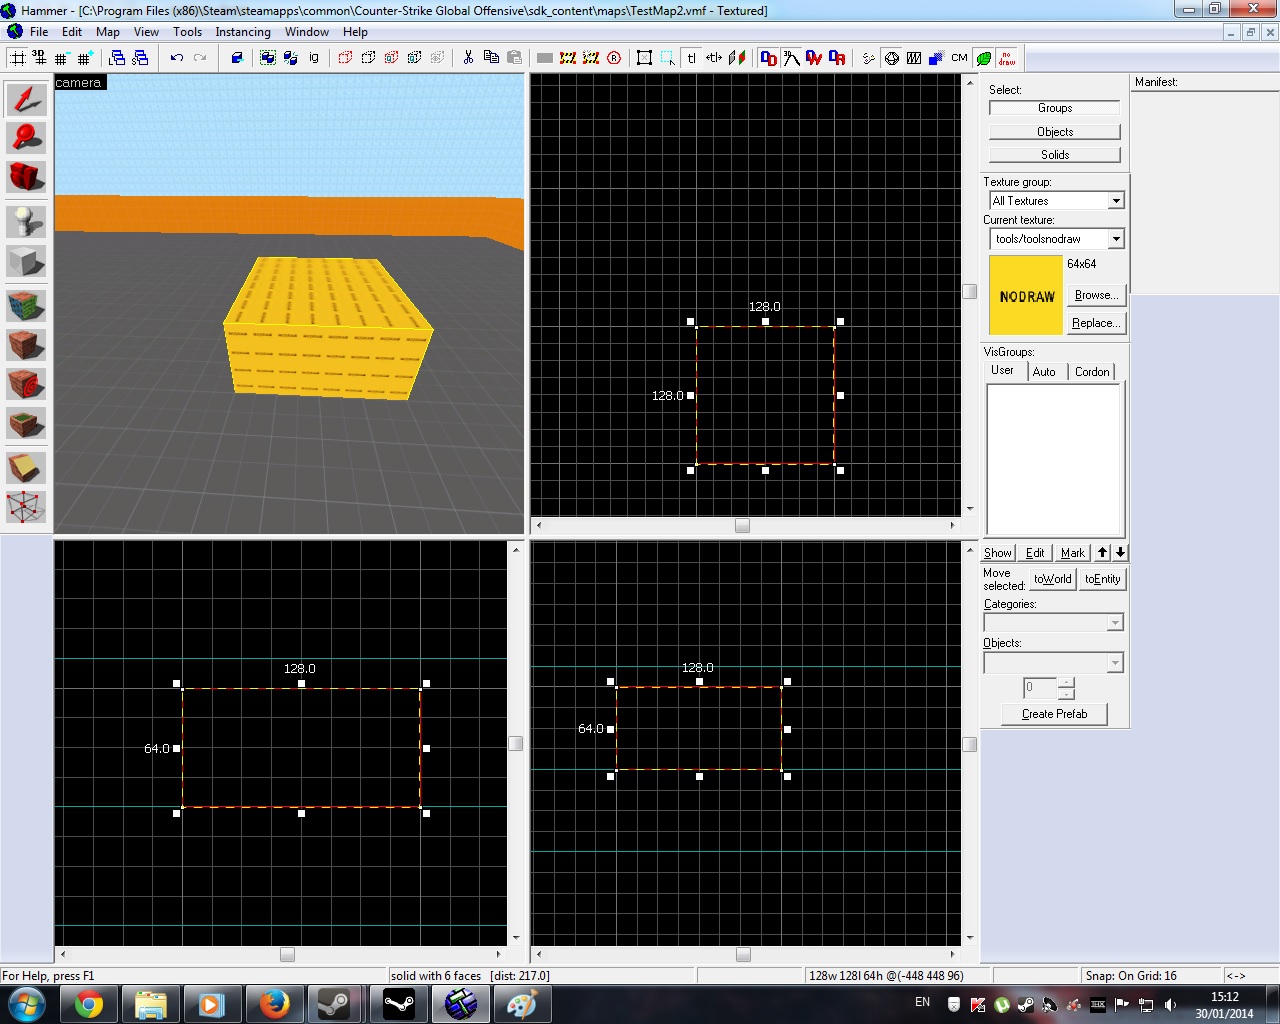
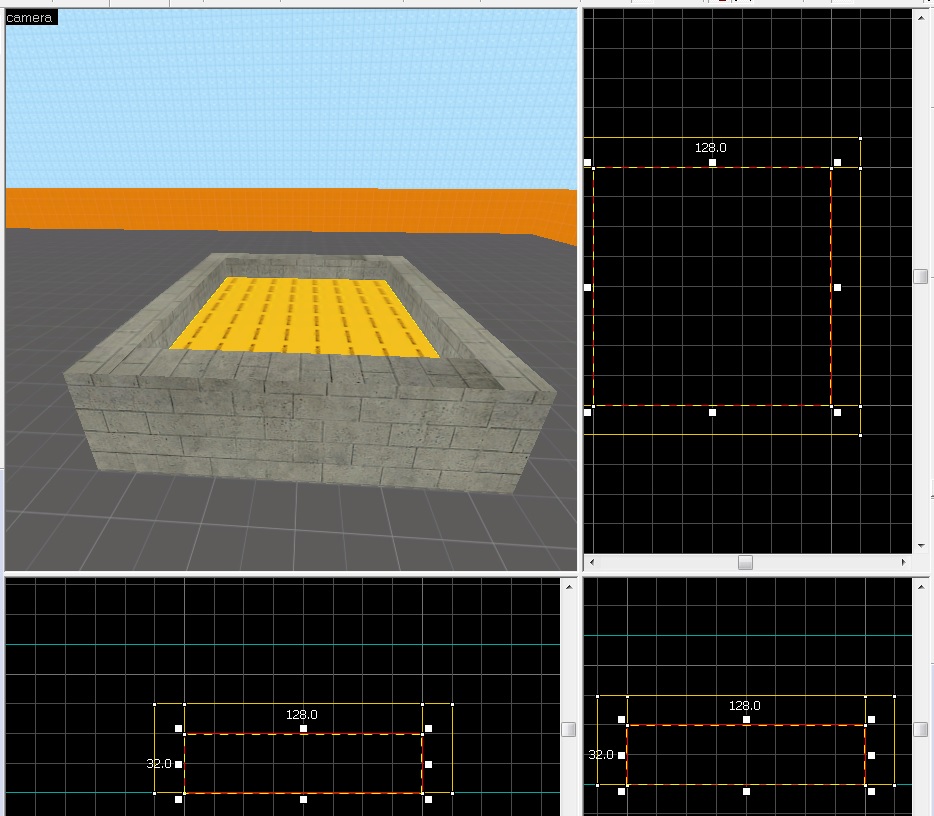
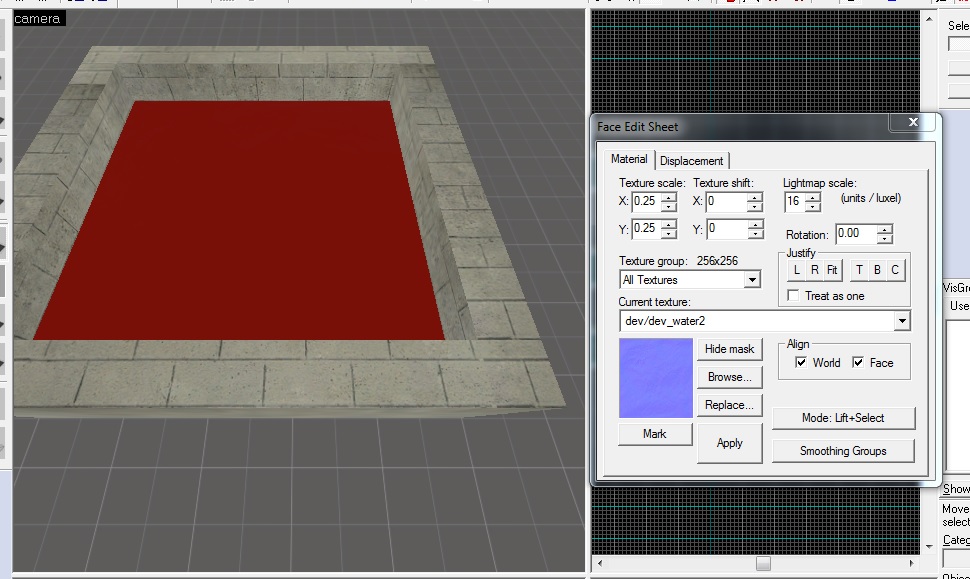
To do this you will first be required to make a brush. Select a reasonable texture (I’d go with a dev texture) and create a brush that is 2 units wide, 55 units long and 104 units high. (Use prop door model to get the measurements)

door4

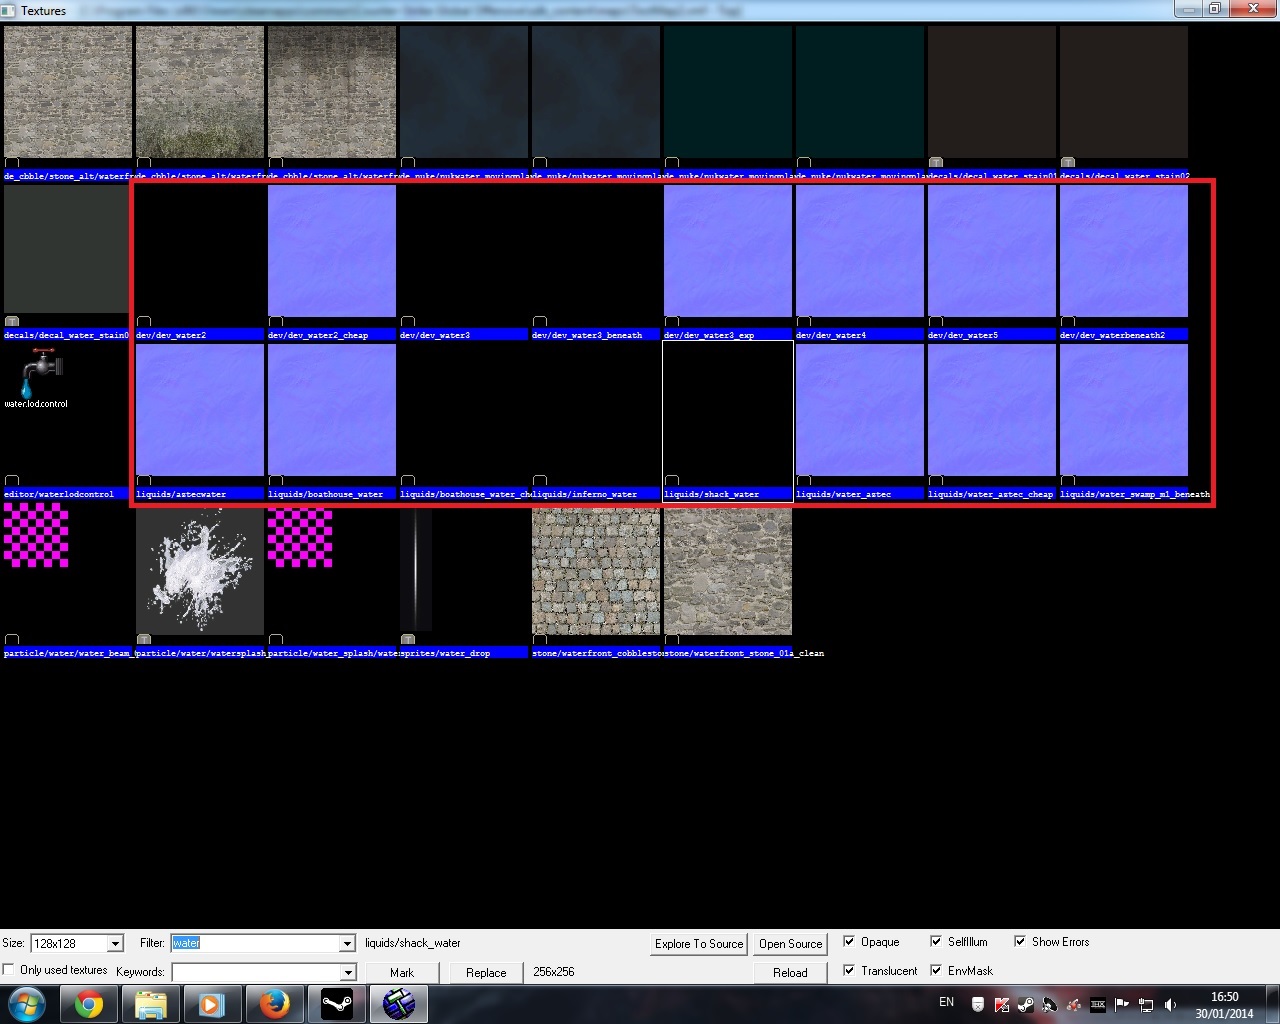
Now that you have a brush, you will want to add a door texture. Select Toggle Texture Application or Shift+A to open Face Edit Sheet. Click Browse button to open the textures window. Search for ‘Door’ and select a texture and apply it to the brush by right clicking on the brush surface (align the texture if required by using justify or measurements features) .

door5

Once that is done, we move on to tying the brush to an entity. There are two options;

Normal Rotating Doors – You can tie it to work like normal rotating door by selecting the brush and hitting Crtl+T to open the object properties. Then from the class drop down list search for func_door_rotating, hit apply and you will notice a purple sphere show on the brush/door.

door6

The sphere represents the rotation point of where the door will rotate around. So you are required to move the point(sphere) to the edge of the brush. Use the top viewport to move the sphere.

door7

Sliding Doors – If you want to create a sliding door (e.g elevator door or spaceship door) then you need to Tie the brush to func_door entity. To do that select your brush and hit Ctrl+T. This will open the object properties. Search under the class drop down list for ‘func_door’, once found hit apply.

door8

To make the door slide you will need to set the Move Direction (Pitch Yaw Roll) field. This will require some in-game testing to figure out which direction you want the door to moves when you use action key. You can use measurer located on the top right of properties window to set the direction.

door9

We are  done once you have figured out the direction.

Extra

There are few fields and states that you would like to experiment with when using doors. Here are few:

  • Under Class Info Tab;
    • Parent – The name of this entity’s parent in the movement hierarchy. Entities with parents move with their parent.
    • Speed – The speed at which the door moves.
    • Spawn Position – set if the door is open or closed when it at the start.
    • Unlocked Sound & Locked Sound – Set them to play a sound to give indication if the door is locked or unlocked.
    • Health/Strength – Allows the door to become breakable.
  • Under Flags Tab;
    • Starts Open – This door spawns open.
    • Non-solid to Player – The player does not collide with this door.
    • Passable – Nothing collides with this door.
    • Toggle – The door is given an input to change this door between open and shut.
    • Use Opens and Use closes – The +use key, when in range, triggers this door.
    • NPCs Can’t – NPCs can’t open this door.
    • Touch Opens – When a player or NPC collides with this door, it is triggered.
    • Starts locked – This door spawns locked and cannot be opened by the player or NPC (but buttons can still trigger it)
    • Door Silent – This door makes no noise  (No sound, and does not alert NPCs).
    • Ignore player +USE – Makes the door ignore players +use
    • Start Unbreakable – Makes the door breakable. (Only works on certain prop models and requires door having health/strength)


In this post I will teach you on how to add hostage rescue zones and hostages to your map. Will also add overlay/decal to define the rescue zones to make is easier to identify the area.

Updated hostage rescue rules allow to display only two hostages per map and you will need only one hostage to be rescued.

Adding Hostages

To add a hostage to the game, select the Entity Tool and search through object drop down list (bottom right side of hammer editor) for either;

  • info_hostage_spawn
  • hostage_entity

Both of them look the same and work the same way.

h2

As you are allowed two hostages per map, I recommend adding up to six, with each hostage entity is set at a different position on the map. The game will automatically select two at random when the match starts.

You can add hostages to an exclusion group that will allow you to define which hostage entities you do not want to spawn together. To do this select the hostages what you do not want to spawn together as a group. Open their properties by double clicking on one of the hostages or right click and selecting properties. Then set the Hostage Spawn Exclusion Group set to ‘Do not spawn together’. Here is example from a map that I have made;

h1

Adding Rescue Zone

Now we move on to adding rescue zone to allow CT players to bring hostages back to. Rescue zones are very simple to do.

We start by adding overlay/decal to identify the area where rescue zone will be. This is done by selecting Apply Overlays or Shift + O, then selecting a overlay by clicking the Browse button to open the Textures window. Search for ‘decals/militiahostagerescue

h3

To apply overlay/decal, left click mouse button on floor brush too apply.

Now we move on to the adding the rescue zone. You will need a brush that will have trigger texture applied to it. So start by selecting the trigger texture by selecting Browse button to open the textures window and search for ‘trigger’.

buy1

Now we create the brush by selecting Block Tool and build the brush that covers the rescue zone decal. Here is an example the map that I built:

h4

Tie the rescue zone brush to entity by right clicking and selecting ‘Tie to entity’ or hitting Ctrl+T. This will open up object properties. Under class drop down list search for ‘func_hostage_rescue’ and hit apply.

h5

Finished. Add Counter Terrorist player entity, compile and run the game to test it.

In-game

2014-01-05_00001 2014-01-05_00002 2014-01-05_00003 2014-01-05_00004

In this post I will teach you how to create bomb sites for CS:GO. These sites will be similar to the ones that are on maps that are provided with the game. Maps such as; de_aztec, de_dust and de_inferno.

Each bomb defusal map should hold two bomb sites; A & B. The first site you make will automatically be assigned as bomb size A. The second bombsite will be automatically assigned as bomb site B.

To set the bombsites you will need two brushes that will have the trigger texture and these brushes will also be required to be tied to an entity ‘func_bomb_target’.

So we start by adding overlay/decal to identify the bomb areas on the map. To do this by clicking the Browse button to open the Texture window and we search for reasonable target decal. Here are a few:

  • ‘bombsite_a’ or ‘bombsite_b’
  • ‘bombsite_letter_a’ or ‘bombsite_letter_b’
  • ‘bombsite_x’

After you have selected a decal/overlay, you will now need to place it on a brush.

To add the decal/overlay select the Apply Overlays overlay or Shift+O, then left click on the surface of the brush to apply it.

overlay2

Now we move on to adding the bomb zone brush, to do this we first click on the browse button to open the Texture window. Use filer by typing ‘trigger’ and select the texture that should look like this;

buy1

Once the texture has been selected, you will then need to create a brush. Select the Block Tool and create a brush that covers an area that you would want to be the bomb target.

bombsite1

Once you have done that we then move on to tying the brush to entity. You can do this by right clicking the brush from front,side or top views and select tie to entity, or simply selecting the brush and hitting Ctrl+T.

The brushes object properties will show up. In the Class drop down list search for ‘func_bomb_target’, then hit apply and you are done.

bombsite2

As I said at the start, the game mode will require you to create two bomb sites. You can simply duplicate the existing brush by selecting the brush, and while holding down the left mouse button drag it to the second target zone, then hold down the shift button and release the left mouse button. It should then create a duplicate brush.

bombsite3

Finally just add a terrorist player entity into the level and then compile and run the game to test the bomb sites. The overlay/decal will make it easier to identify the areas in-game.