Archive for May, 2014

In this post I will teach you how to turn an image file such as (.jpg, .bmp, .png) into a texture which then can be used in CS:GOs Hammer Editor.

Hammer editor takes texture files as .vtf and .vmt.

VTF (Valve Texture Format) – Is the proprietary texture format used by the Source engine. VTF files are generally referenced in a Material instead of being accessed directly, which allows re-use in different ways.

VMT (Valve Material Type) – Is a text file that defines a two-dimensional surface. It contains all of the information needed for Source to simulate the surface visually, aurally, and physically.

So it works as VTF the texture and VMT is the information that hammer needs to use that texture.

So for the purpose of this post you will need two things;

1- Converter (VTFEditor)

This will use to convert image into .vmt and .vft files. The converter that you will be required to use can be found Here (vtfedit125-11 Archive Version). If link does not work then download it from here.

Open the zip file and extract the files within it. (I use WinRAR to open zip files, if you don’t have it download it here: WinRAR). There will be the files within vtfedit125-11;

vtfeditor

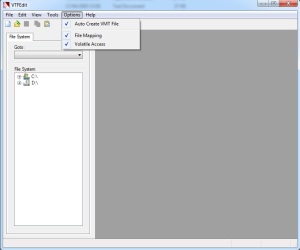
Double click the vtfedit application to open it and under optiosn tab make sure that ‘Auto Create VMT file’ is selected.

vtfeditor1

Now you have that done we move on to selecting image.


2- Image file (.jpg, .png ..etc)

Note: Source engine requires images dimensions to be of power of two (64×64, 128×128, 1024×1024, 128×512 256×1024 …etc).

I have created an image that is 128×128 (Right click the image and ‘Save image as..’ if you want it);

RedSteel


Converting Image File

Now that we have converter downloaded and have the image that we want to convert, we move on now to creating the vmt and vtf files.

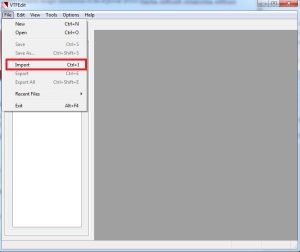
Open up vtfeditor, under File tab select Import

import

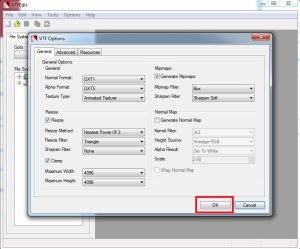
A Dialog box will open, here you will search for the image file that you want to import in the software. When you find it double click it to select it. After selecting it another a ‘VTF Options’ window will show, leave everything and just press OK.

vtfoptions

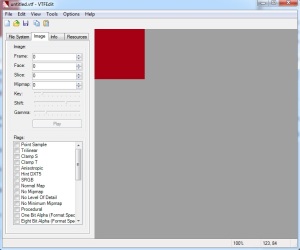
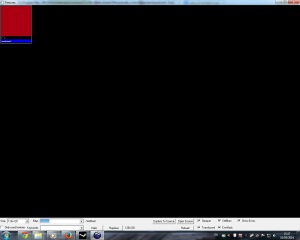
Now you will reach to this stage

vtfeditorred

All is left to do is name and save it at the appropriate file location. Hit file table and click ‘Save’ or ‘Save As’. A dialog box will show, give the file a name and save it in the game materials folder. Here;

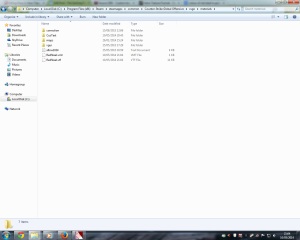
C:\Program Files (x86)\Steam\steamapps\common\Counter-Strike Global Offensive\csgo\materials

savesteel

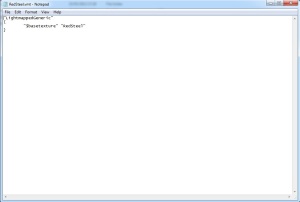
All you need to do now is check if the information in the .vmt file is correct. Select and right click the file, and click on ‘Open With’. (If you don’t see ‘Open With’ then double click it and select option ‘Select a program from a list of installed programs. Select Notepad and deselect ‘Always use the selected program to open this kind of file’) This is how vmt file will show;

vmt

If you plan to save them in a custom sub folder, then make sure you add sub folders name before the texture in vmt file. Like so “$basetexture” “CustomTexture/RedSteel”. If not then leave it as it is.

Note: Make sure that they both in the materials folder.


Testing the Texture in Editor and in game

Now that you have the texture, launch CS:GO hammer editor. Select the browse button located on right side of the editor to open the ‘Textures’ window. Filter for name of the texture (mine is RedSteel)

ingame

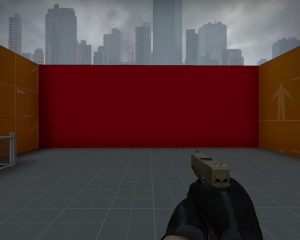
Apply it on to an block and then Compile and Run the game to test it in-game.
2014-05-10_00001

In this post I will show you how to add and config sound entities to your Counter-Strike: Global Offensive level.

In CS:GO there are several sound entities;

  • env_soundscape.
  • env_soundscape_proxy.
  • env_soundscape_trigger.
  • ambient_generic.

But will focus on ambient_generic and env_soundscape (env_soundscape_proxy and env_soundscape_trigger are similar to env_soundscape).

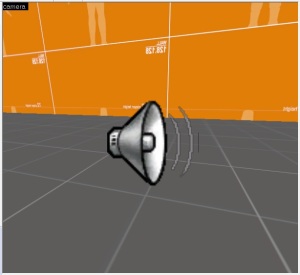
sound

(env_soundscape – ambient_genetic)

env_soundscape – Is a point entity available in all Source games. It changes the active soundscape of players, and defines where positioned sounds within it play from.

env_soundscape_proxy – It is an env_soundscape that inherits all of its properties except radius from another entity. This is useful when dealing with an area that doesn’t have clear line of sight, and so requires several identical soundscape entities.

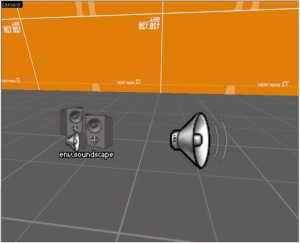
soundscape

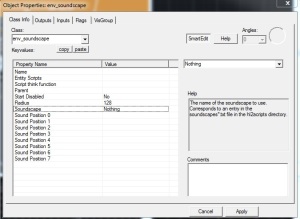
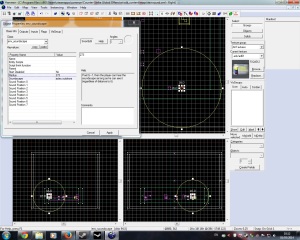
OK let me show how to add one. Select the entity tool and search in the objects dropdownlist for ‘env_soundscape’, then left click in the level to add the entity. Double click the entity to open its properties;

soundscapprop

  • Start Disabled – Stay dormant until activated.
  • Radius – Defines the entity’s sphere of influence. Players must also be able to see the entity for it to trigger. -1 means infinite range.
  • Soundscape – The name of the soundscape to play.
  • Sound Position 0-7 – Entities which define the location from which any positioned sounds play. Must be entities that the client knows about (e.g info_target or anything visible).

Soundscape List for CS:S – Click Here (This is CS:Source soundscape not all will work with CS:GO)

Samples of the CS:GO Soundscape – Click Here (Video is provided by 3klicksphilip)

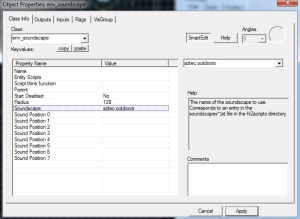
So set the soundscape property value to the soundscape that you want (I’ll use aztec.outdoors)

soundscapeset

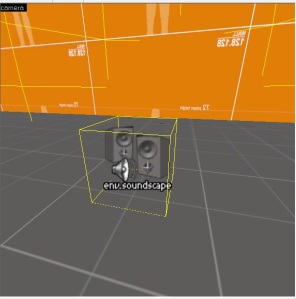
Next you would want to increase the radius of which where you are able to hear the soundscape. You can do this by increase Radius value or expand the circle in one of the viewports.

soundscapesetradius

To make it work you will need to leave Start Disabled property at No. I am disabling it because, I want it to be triggered by a button.

Compile and run the map for hear soundscape in-game.


ambient_generic – Is a point entity available in all Source games. It plays a sound, either once or on loop, and either from a location in the world or globally. Use it to play and control a soundscript sound, a raw .wav sample or a scripted sentence.

ambient

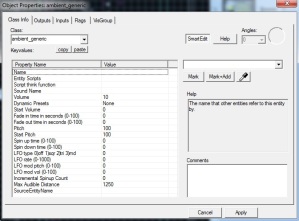
Select the entity tool and search in the objects dropdownlist for ‘ambient_generic’, then left click in the level to add the entity. Double click the entity to open its properties;

ambientprop

  • Sound Name – Name of the Game Sound entry for the sound to play. Also supports direct .wav file names.
  • Volume – Sound volume, expressed as a range from 0 to 10, where 10 is the loudest.
  • Pitch – Pitch, where 1 is low, 100 is normal, and 255 is high.
  • Start Pitch – Start Pitch.
  • Max Audible Distance – Maximum distance at which this sound is audible.
  • Dynamic Presets – Various DSP (Digital Signal Processor) effects that can be applied.
  • LFO type – Type of Low Frequency Oscillation to employ. Options are; Off (default), Square Wave (alternate between low and high), Triangle Wave (sharper transitions), Random.
  • LFO rate – How frequently the LFO effect repeats itself.
  • LFO mod pitch – Affects the sound pitch. Higher numbers change the pitch more.
  • LFO mod volume – Affects the volume of the sound, causing it to “pulse”.

Flag options;

  • Play everywhere – Sound always plays from all speakers at its configured volume.
  • Start Silent – The map will start without this sound playing. Enabled by default.
  • Is Not Looped – Changes how the ambient_generic handles stopping and starting playback.

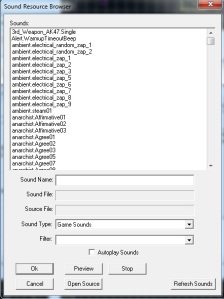
When working with ambient_generic all you really need to do is select Sound Name.You do that by selecting the Sound Name properties and click the browse button. Sound Resources Browser window will pop up.

ambientsoundname

Make sure that ‘Game Sounds’ is selected as the Game Type. Then filter for the sound that you want to add. If you are unsure about the Sound file, select it and click preview to play the sound file (If it doesn’t play then its corrupted or doesn’t work). If you have found the sound file that you wanted, then selected and press ‘Ok’ or double click the file.

You can leave everything on default. I’ll give it a name so then I could call it when a user presses a button, or call it when triggered by event.

compile and run the map to hear sound in-game.


Video