Archive for March, 2014

In this post I will cover how to use func_TankTrain. Func_TankTrain is a brush entity available in all Source games. It is a moving train that follows a path of path_track entities.

For this tutorial you will require few things;

  • A block, which we will tie to entity func_TankTrain
  • Couple of path_track (To set the path that block will take through the world)
  • A prop_dynamic (for the purpose of this post)

Lets start by creating the path that our tank will take. To do this select the Entity Tools and in the Object dropdownlist search for ‘path_track’. Once you have found it, left click in the world to add one. Double-click the the path entity to open its properties, and give it a name e.g. path1.

path

Now duplicate it be select the first path and drag it to second location. Before letting go of the right-mouse button, hold down the shift button and then let go. You will notice that a line connecting the the two paths. Also the second path_track will be given a name.

path2

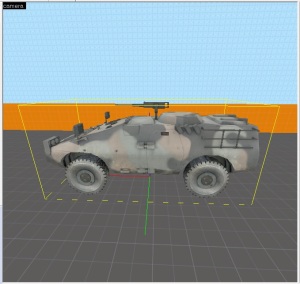
Now we move on to creating the block with func_tanktrain. I will add prop that I would want to move. Add prop_dynamic entity of your choosing, I will go with the pi_apc.mdl model.

path3

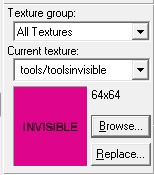
If you using an prop entity, then you will be required to create a brush that will have the invisible texture applied to it. To do this click the Browse button on the right side of the editor to open the Textures window. Filter for invisible and double click the texture to select it.

invi

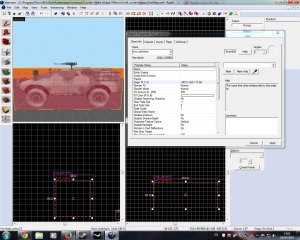
Now click the Block Tool and create a template of the brush. Make sure the template covers the prop, then hit enter to create the brush. Then select the brush and hit Ctrl+T to open the object properties. Under Class dropdownlist search for ‘func_tanktrain’, select it and hit apply.

path4

Now we move on to setting the properties for the func_tanktrain. This will require some in-game testing for figure out the correct settings. Also you may need to turn the brush and the prop so that It will be facing the same direction as the path.

If you want to rotate the prop and brush, select both of them, then right click and click on Transform. A Transformation window will  open up. To Rotate make sure the Mode is set to Rotate and insert a number to the Z textbox to rotate the objects.

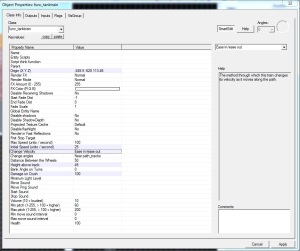
Double Click the brush to open its properties. Here are few properties to take into account;

  • First Stop Target – The name of the first path_track in the train’s path. The train will spawn at this path_track. It will also turn to face direction indicated by the ‘Orientation Type’ setting.
  • Max Speed – The maximum speed that this train can move. Any speeds applied to this train, such as by path_tracks or SetSpeed inputs, will be clipped to this maximum value.
  • Initial Speed – The speed that the train will move at after it spawns, 0 = stopped.
  • Change Velocity – The method through which this train changes its velocity as it moves along the path.
  • Damage on Crush – The amount of damage this train does to entities that block it.
  • Health – The amount of health the entity has. Which can be drained when players do damage to it.
  • Start/Stop/Move Sound – A sound played when the train stops/starts/moving.
  • Height Above the Track – The height above the track that this train moves.

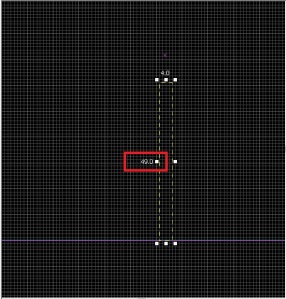
For the purpose of this post I will only set the important properties. Lets start with Height above the Track, to measure this use the side or the front viewport and create a template from the floor brush to the centre of the tanktrain brush.

path5

Set the Height above the Track to equal the value in the red rectangle (If the prop is not touching the ground or is within the ground, then you will need to come back and add or take away from this value).

We’ll leave Max speed to its default value of 100 and set the Initial speed to 50 (It’s important to set the initial speed or the tanktrain will just jump between the track points). Will set the Change velcitiy to Ease in/ease out, so the looks like starts slow, speeds up and then as it gets closer to the second path_track slows down.

Now we will set the First Stop Target (starting point of the tracktrain), which will be the first path_track entity (path1).

Will also set the damage crush to be 100 with the flag setting of it being unstoppable by player, this can be found under the Flags tab.

path6

To parent the prop to the brush, you will need to give the brush a name (e.g. apc) and in the prop properties under parent set it to equal that name.

Compile and run the level.


Complex Path

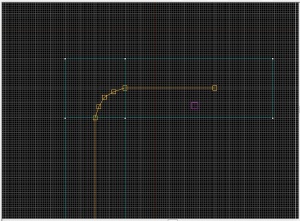
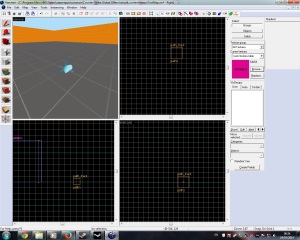
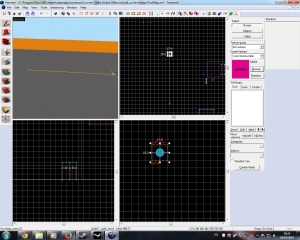
If you plan to make a route that goes through a road that that has corners then I recommend using more than one path_track at the corner to make the animation of the turn smoother. The more you add the smoother it will get Like so;
path7

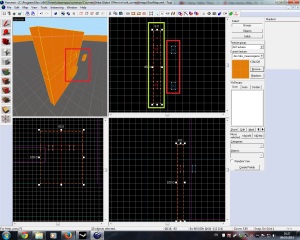
In this post I will teach you how to create a button. For this I will use the crane that I made in the previous post, to test the button call to a function within an entity. To make a button you will need to make a brush and tie it to an entity. So I decided to create a control panel by slicing up a brush into smaller brushes and leave space for buttons;

button

Panel highlighted by the green rectangle and the red rectangles highlights the brushes that I will transform into buttons.

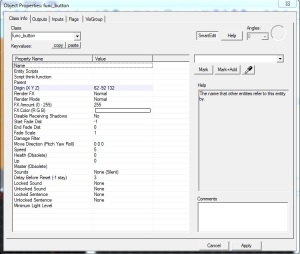
Select one of the brushes that you want to turn into a button and hit Crtl+T to open up the object properties. Under Class dropdownlist search for ‘func_button’, select it and hit apply.

button2

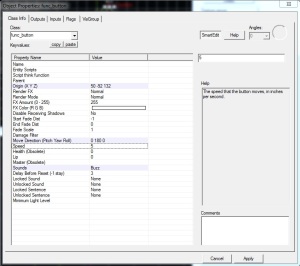
Properties of interest are:

  •  Move Direction (Pitch X Y Z) – The direction the button will move when an action is performed by a user.
  • Sounds & Unlocked Sound – Sound it plays when an action is performed by a user.
  • Speed – The speed the button will move. In which how many inches it will cover.
  • Delay Before Reset – The amount of time it takes before the button moves back to its original position.

Under the Flags Tab:

  • Don’t move – Will stop the button from moving when an action is performed by a user.
  • Touch Activates – Touch activates the button.
  • Damage Activates – Damage activates the button.
  • Use Activates – Use action activates the button.
  • Toggle – Toggle button between pressed and un-pressed.
  • Starts Locked – Locked unable to be used by users.
  • Sparks – Sets sparks when an action is performed.

For case of this post I will show you how to make the button move in when pressed, at a standard speed, with and action sound and with the button resetting in three seconds.

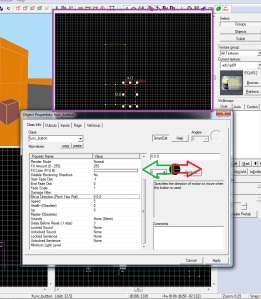
Move Direction is the direction the button will move when an action is performed by a user. So from what we have above, we will want the button to move into the panel. Select the button and open its properties. Under the Move Direction property you will notice that default value is set to zero which is to the right. So using the top viewport we would want the button to move into the panel, so you will need to move the handle to the left.

button3

Red arrow is the default move direction, green arrow is the direction that we want to move the handle to. Purple rectangle is inform you to use the top viewport for finding out the correct direction.

We also want the button to rest to its original position three seconds after it has been pressed. As the property is already set to three, no changes need to be done. If you want it to take longer then add a higher number. If you never want it to reset then set the value to -1.

Setting the sound. This will require some in-game testing to actually hear the sounds play when a player uses the button. They are all different, but in the case of this post I’m just going to go with ‘Buzz’.

I will leave the speed at 5. The higher the value the faster it will move.

button4

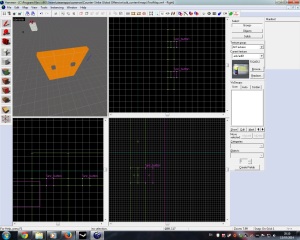
Finally duplicate the button and put it at the second opening on the panel brush. Make sure to position them just outside the panel brush as you will want the buttons to move in when pressed.

button5

Adding a call to a function

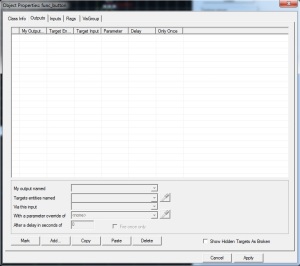
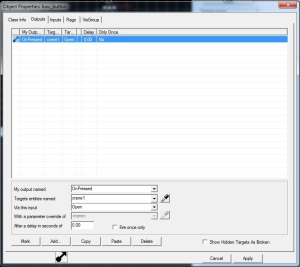
Now that the buttons are done, we will want to to add a call to a function. The the call that we will add is to allow the user to move the crane that taught how to make in the previous post. Select left button and open its properties, then select the Outputs tab.

button6

Here is where I’ll teach you how to add a call to a function.

We start by selecting the add button to add a function. Select the function that we just added, and in the My output named dropdownlist filter for ‘OnPressed’. Which sets what will cause the call of the function (So when the button is pressed it will call the function). In the Targets entity names dropdownlist filter for the crane name, which was ‘crane1’ (This sets the entity you want to add function to, so in this case want to move the crane). In the Via this input dropdownlist filter for ‘Open’ (set the type of function you want to the entity to do, in this case open moves the crane to the move direction value that we set for it).

Additional features are;

With parameter override of – This is used if you want to override a certain property value in the entity.

After a delay in seconds of – This allows you to set a delay period before calling the function.

button7

Now that you have done that, you will want add a call to the right button to set the crane back. To do this, the fast way is just to select the call and hit the copy button. Then open up the Outputs tab in the right button and then hit paste. The only change you will then need to do is to change the Via this input value from ‘Open’ to ‘Close’.

Compile and run the game to test it out.

In this post will teach you how to move objects using func_movelinear. This can be used to create many things like; cranes, lifts, moving props that do not have an animation and other things. If you want to use a vehicle prop, then I recommend you check if the prop has animation first. If not then use func_tanktrain. Which I will cover later on.

For purpose of the this demonstration, I will be using func_movelinear to create a crane. For this you will need;

  • A prop_dynamic prop
  • A Brush with the invisible Texture applied.

Lets start with by selecting the Entity Tools and Filter for prop_dynamic in the Objects dropdownlist. Left-Click in the world to add the entity. Double click the entity to open the properties, and under World Model select the Browse button to open the Model Browser.

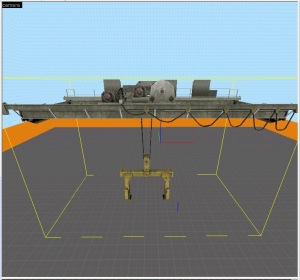
In the model browser filter for ‘Crane’ and select the first one by double clicking on it (de_nuke\craneb.mdl). Once you have it selected, hit Apply.

crane

Now we move on to creating a the brush. First select the invisible texture by clicking the Browse button at the right side of the hammer editor to open the Textures window. Use ‘invisible’ in the filter and double click the invisible texture.

invi

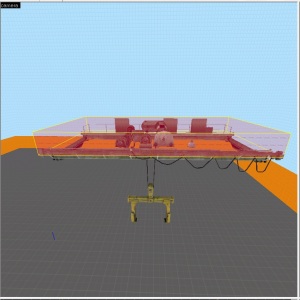
Now select the Block Tool and create a template the covers top part of the crane prop. Then hit enter to create brush.  Like so;

crane2

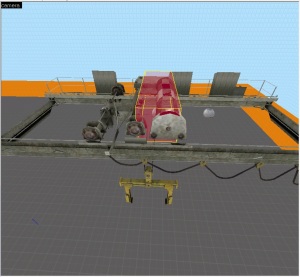
You can resize the brush if you like to only cover small part of the crane. Just make sure that brush is at the centre of the prop. In the end it is up to you, either way you will require to parent the crane to the brush.

crane3

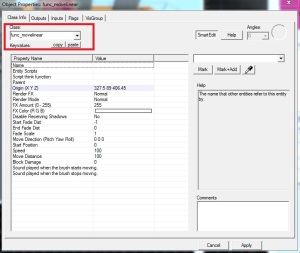
Select the brush and hit Crtl+T to open the object properties because we will want to tie to an entity func_movelinear to the brush. Filter the class dropdownlist for func_movelinear and hit apply

movelinear

Give the brush entity a name (e.g. crane1). The properties that you will need to take into account are;

  • Speed – Speed the brush moves.
  • Move Distance – Distance the you want to brush to move.
  • Move Direction – The direction you want the brush to move.

Speed can be set easily, lower the value the slower it will move.

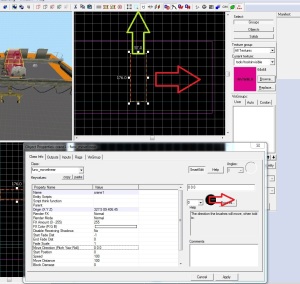
To identify the direction you want the brush to move, you will need to select Move Direction field and use the top viewport to find the right direction. From the image below you will notice that default move direction is set to the right (identified by the red arrow) but we want the crane to move in upper direction (green).

direction

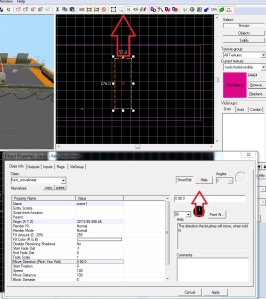
To do this select Move Direction and direct the hinge up, like so;

direction2

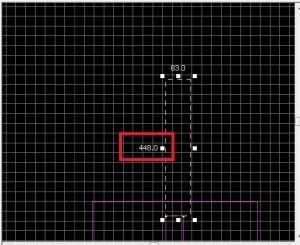
Distance is simple but it requires come calculation. Distance is amount grid squares the brush will have to travel. To calculate it, look at the top viewport and drag a template from where the brush starts to where you want the brush to end, like so;

distance

The value in the red rectangle is the distance.

Only thing left to do is open up the prop_dynamic properties and set its parent value to equal the brush name (crane1).

Here is test video from one of my maps, where I use metal blocks to activate the crane forward and backwards;