Archive for April, 2014

In this post I will teach you how to add and config a few other entities, such as;

  • env_shooter, which I’ll use to create a dispenser that gives out drinks.
  • env_shake, to create an earthquake effect.
  • env_steam, to add detail to damaged pipes.
  • chicken, add a few chickens into the level, why not?
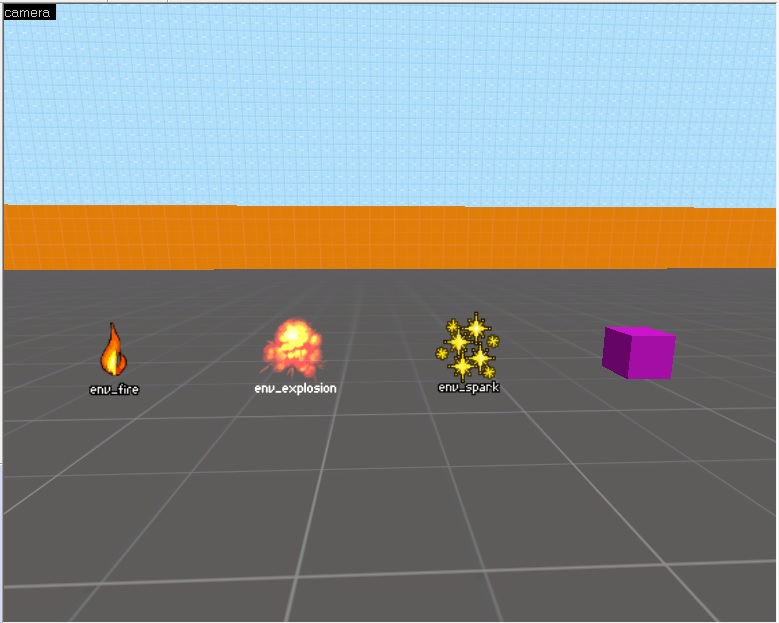
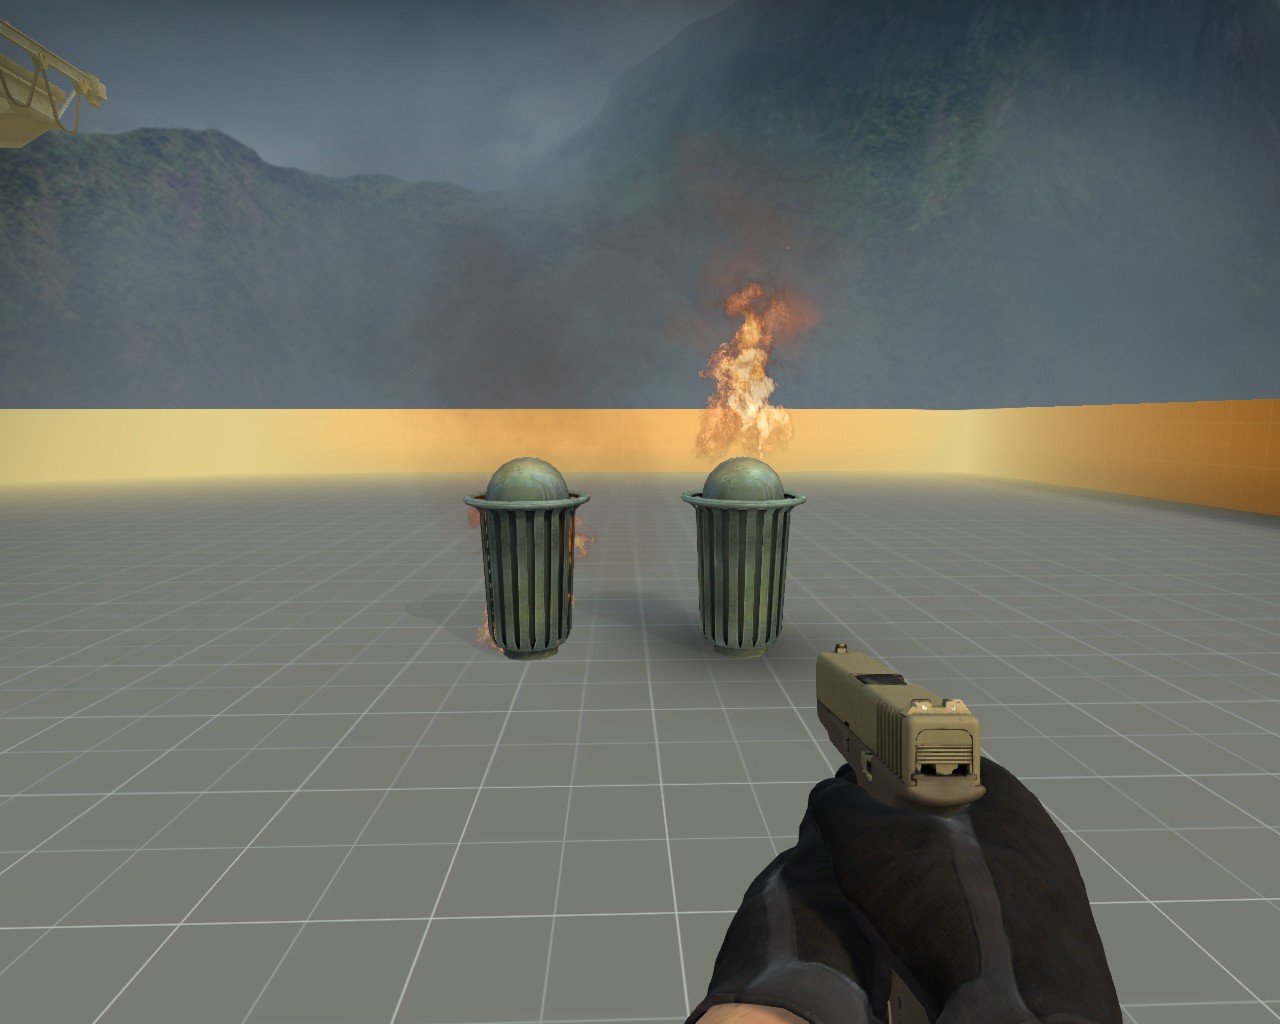
entities

R-L

env_shooter – is a point entity available in all Source games. It shoots giblets out of its origin. These gibs can be either models or sprites.

env_shake – is a point entity available in all Source games. It controls screen shakes on players. With this entity you can simulate tremors (earthquakes, blast waves, passing vehicles).

env_steam – is a point entity available in all Source games. It is used to create a jet of steam or heat wave distortion.

chicken – Chicken is a chicken.


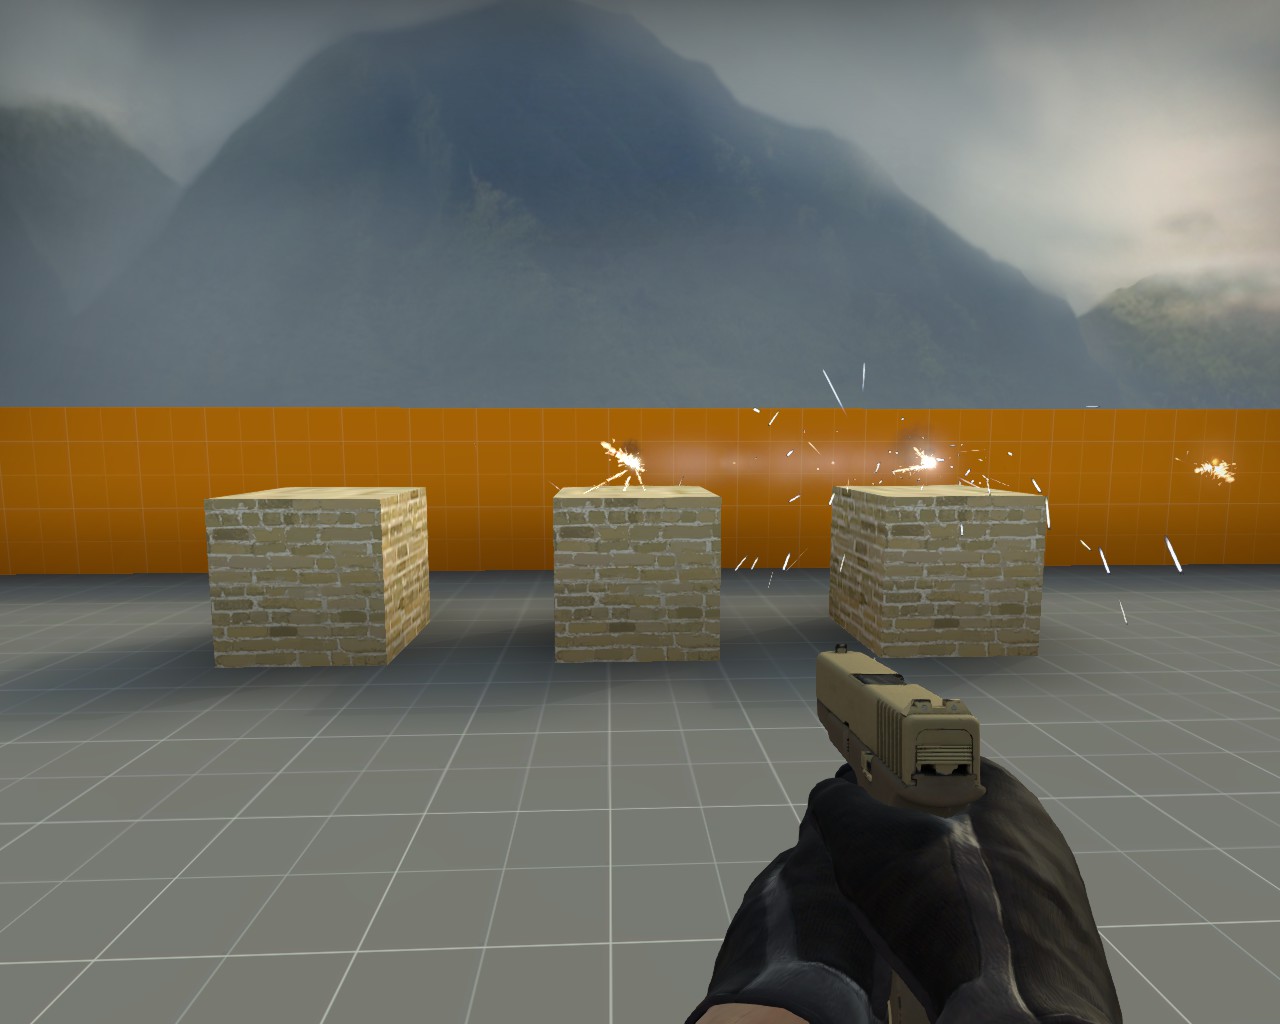
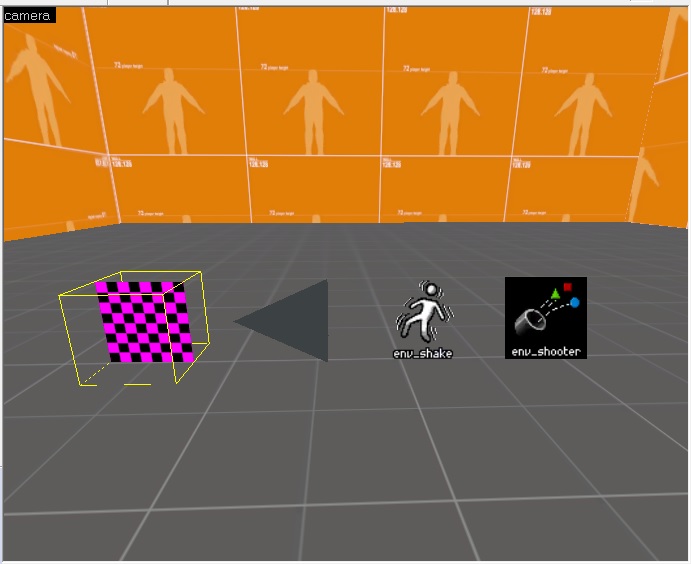
env_shooter (Dispenser)

shootericon

To do this I will need; env_shooter and prop (preferred prop_dynamic).

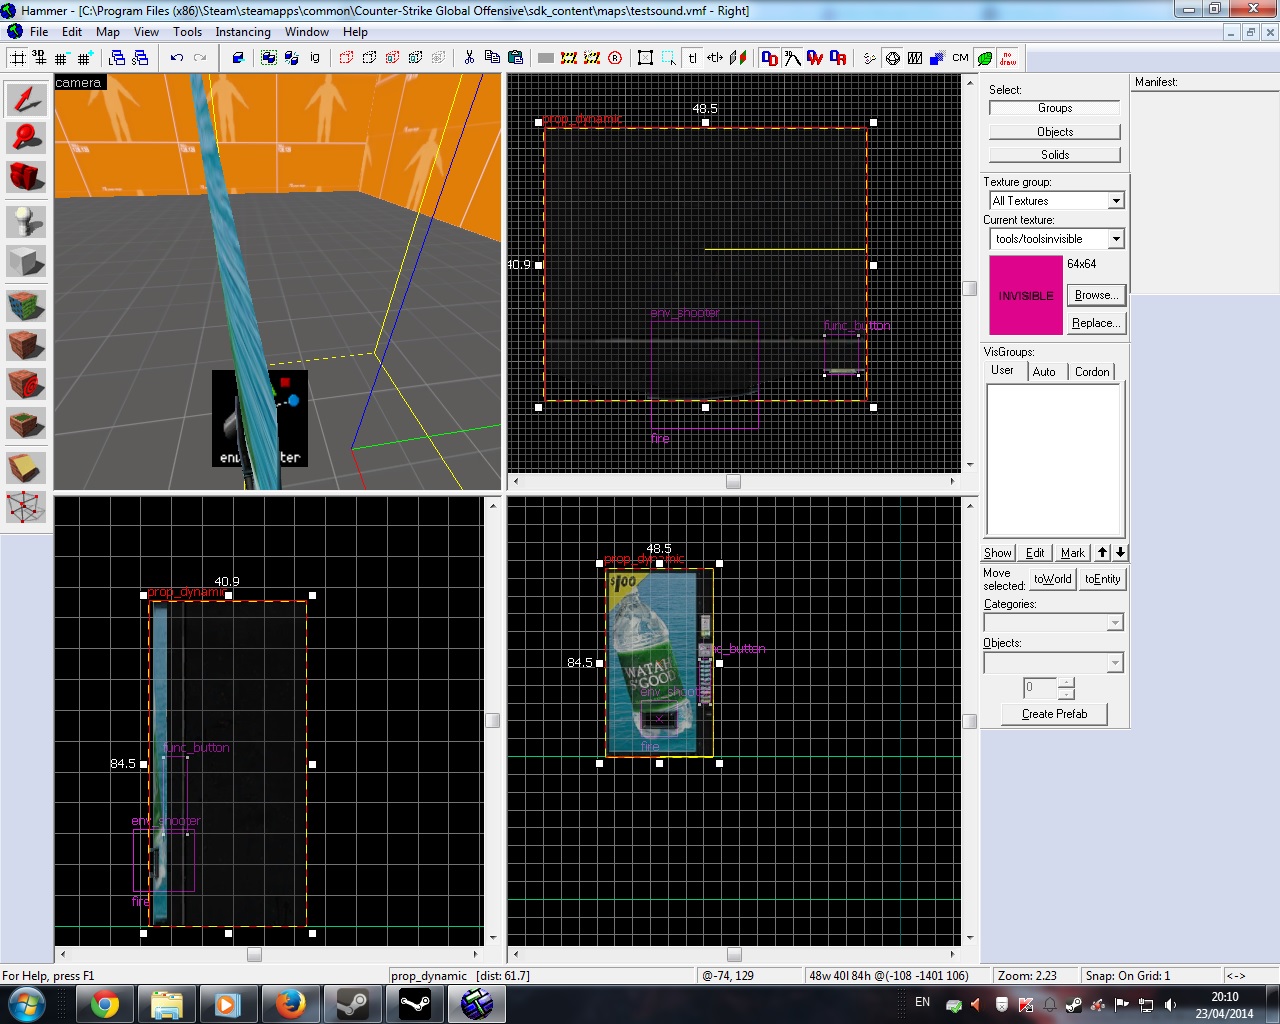
Select the Entity Tool and use Objects dropdownlist to find prop_dynamic then left click in the level to add it. Double click the entity to open its properties. Open the Model Browser by selecting World Model and clicking browse. Select the vending machine model (vending_machine.mdl), then hit OK. Hit apply and close when finished (Reposition if necessary)

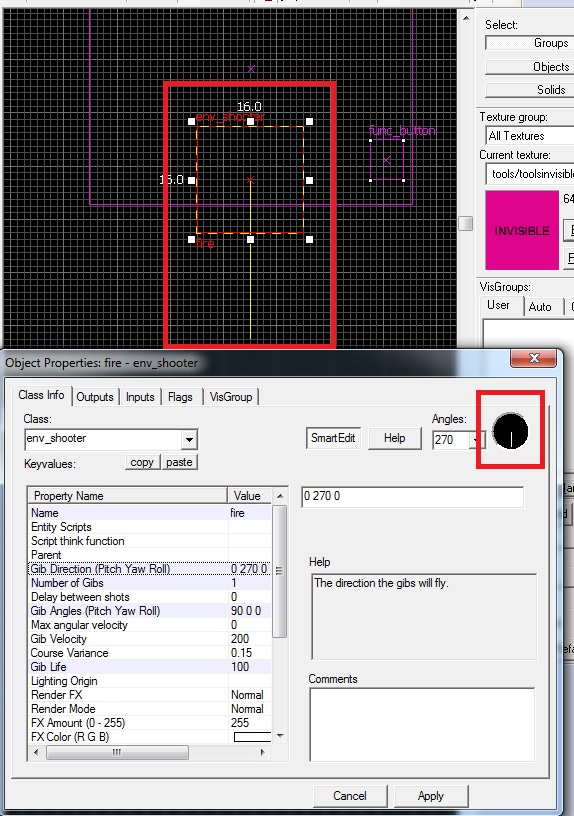
Select the Entity Tools again and filter this time for env_shooter and add it to your level. Reposition it to where the you want the giblets to come out from the bottom of the vending machine.

shooter

Double click the env_shooter entity to open its properties. You will notice it has a lot of properties that you can set. Here a few of the important ones;

env_shooter


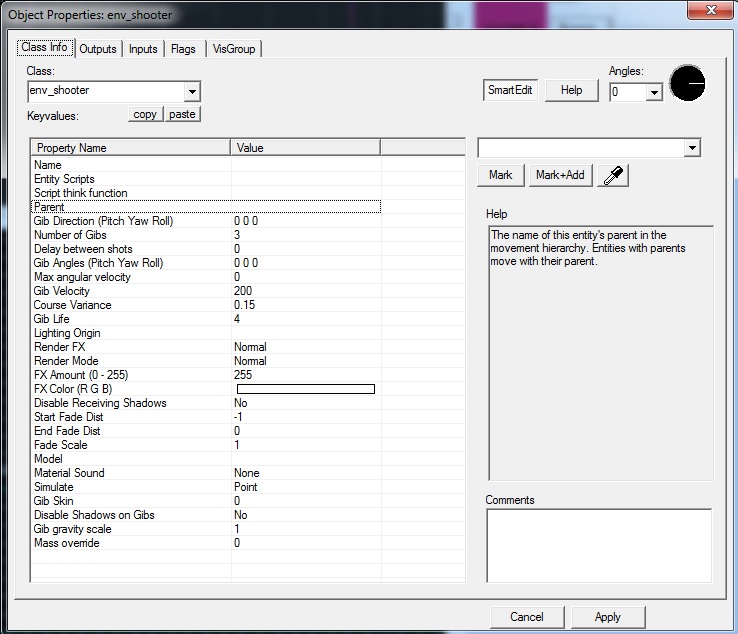
  • Gib Direction – The direction the gibs will fly.
  • Gib Angle – The orientation of the spawned gibs.
  • Gib Life – Time in seconds for gibs to live +/- 5%.
  • Gib Velocity – Speed of the fired gibs.
  • Number of Gibs – Total number of gibs to shoot each time it’s activated.
  • Model – Thing to shoot out. Can be a .mdl or a .vmt.
  • Simulate – Type of Model it will shoot it.
  • Delay Between Shots – Delay (in seconds) between shooting each gib. If 0, all gibs shoot at once.

For the purpose of this post, I will set a few changes to these properties to allow bottles to shoot out from the vending machine.

  • Start with the model. Select the Model property and hit browse button to open the Model Browser. Filter for bottle and select water bottle (water_bottle.mdl). Hit OK to apply it.
  • Set the Simulate to be physics, as we want the bottle to have physics properties.
  • Set number of gibs to be one, as we want one bottle at a time.
  • Leave the Delay Between Shot at zero and Gib Velocity at 200 (The larger the value the further and fast it will go out).
  • For Gib life is optional, as it relays on how long you want bottle to say in the level. I’m going with 100.
  • Gib Angle 90 0 0. It will shoot the bottle side ways.
  • Use  Top view port to config Gib Direction.

shooter1


Lastly click the Flag tab and enable the repeatable setting to allow you use the env_shooter more than once.

Now that you have done that you will need to add a button to the machine to shoot out the bottle. I am sure you able to do that by now (hint create a brush with the invisible texture and tie it to button entity. In the Output tab set the Via this input to shoot).

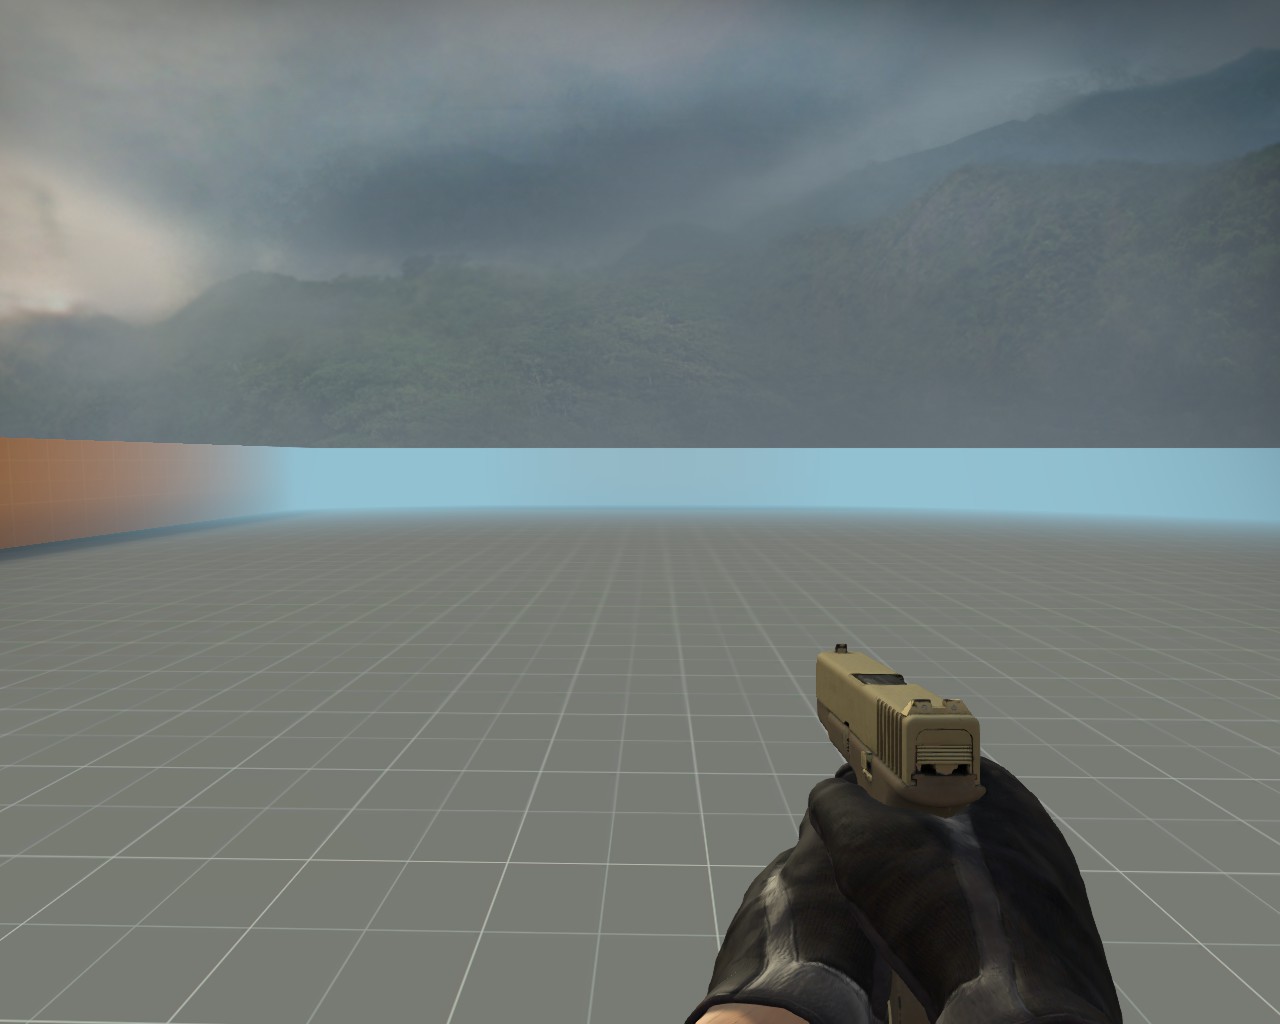
Compile and run the map to test it.


env_shake (earthquake)

earth

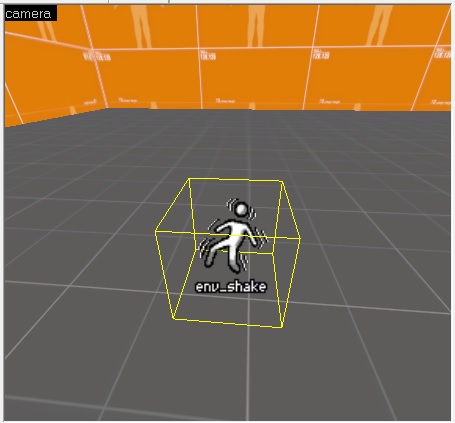
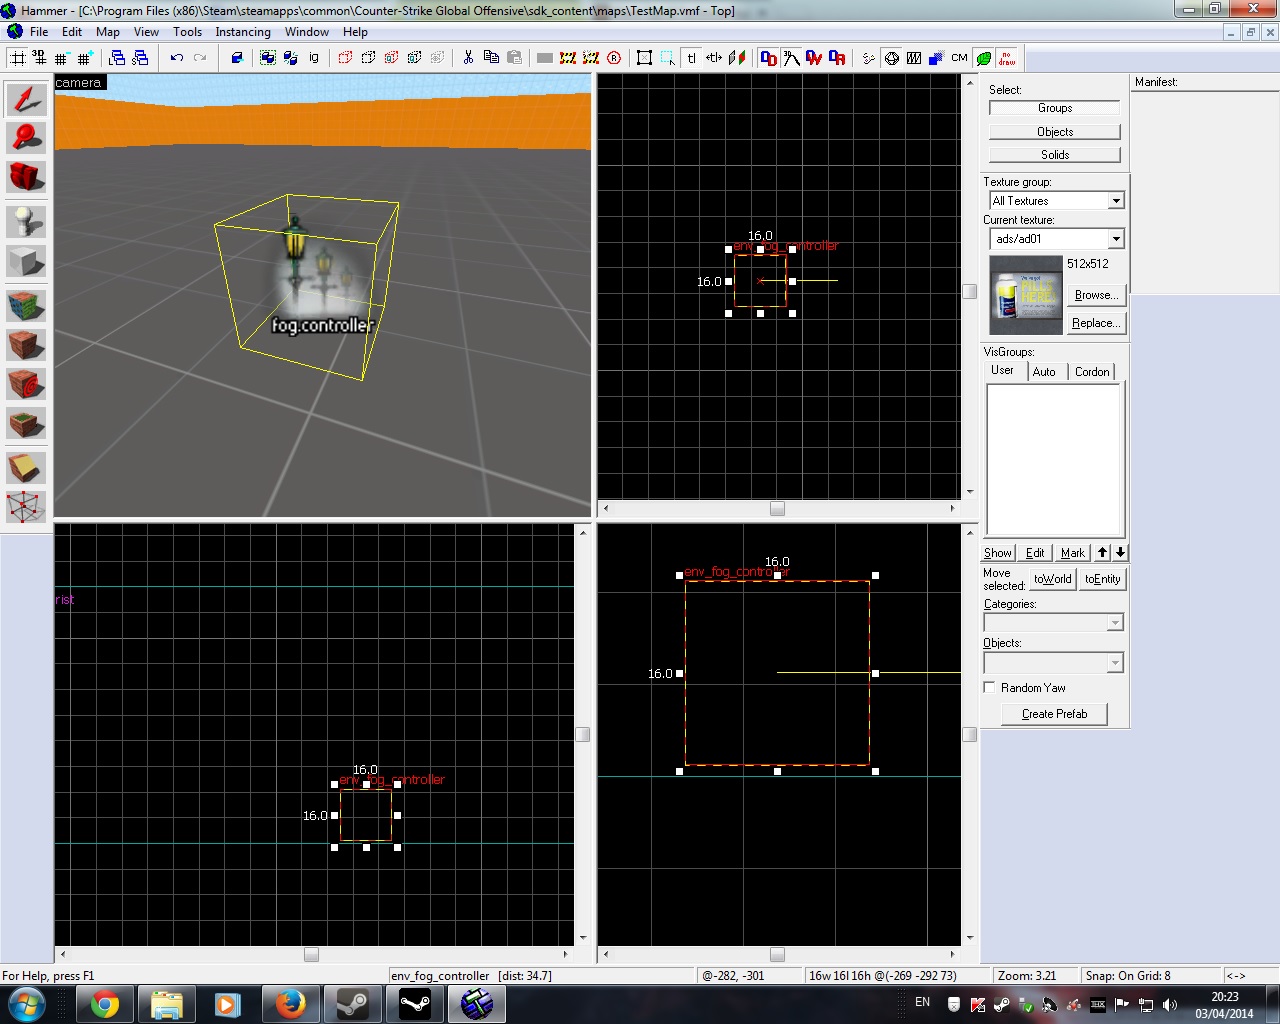
Select the Entity Tools and Filter for env_Shake in the Objects dropdownlist. Left click to add to the level, then double click the entity to open its properties.

earth2

Properties are;

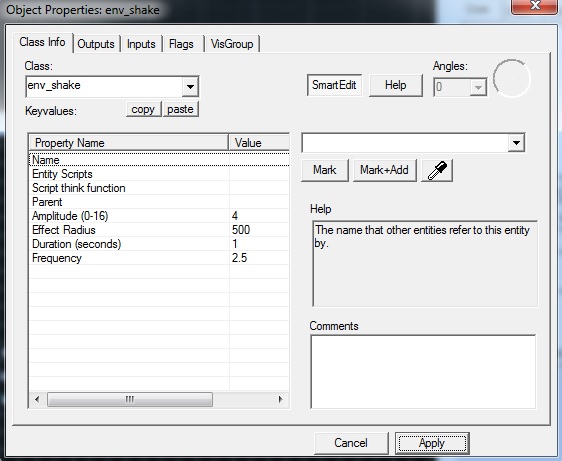
  • Amplitude – The amount of noise in the screen shake. Should be a range between 0 and 16.
  • Effect Radius – The radius around this entity in which to affect players.
  • Duration – The length of time in which to shake the player’s screens.
  • Frequency – The frequency used to apply the screen shake. Should be a value between 0 and 255, where 0.1 = jerk, and 255.0 = rumble.

Flags setting are;

  • GlobalShake – Shaking occurs throughout the entire map.
  • In Air – Objects in the air are affected by the shaking.
  • Physics – Shake physical objects to create realistic feel.
  • Ropes –  Shakes ropes.
  • Don’t shake view – Doesn’t shake players view.


This entity requires some testing to figure out the right property values. I have create two, each connected to a button to test the difference in-game

1- Default Amplitude and Frequency, but increase duration to notice the affect.

shake2

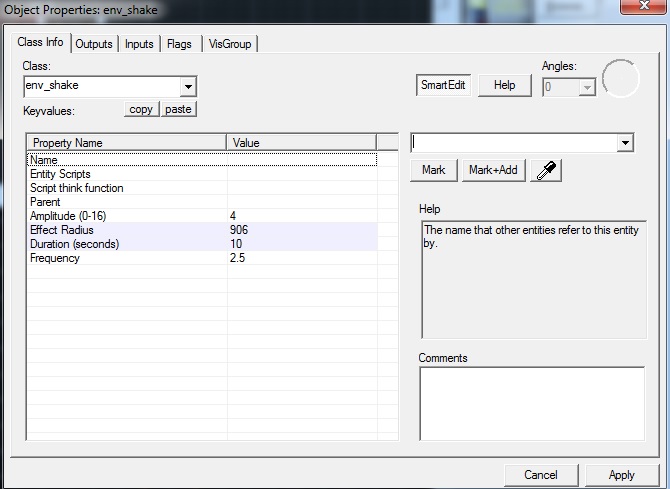
2- Increased the Amplitude 10, set the frequency to 180 with duration 10.

shake1

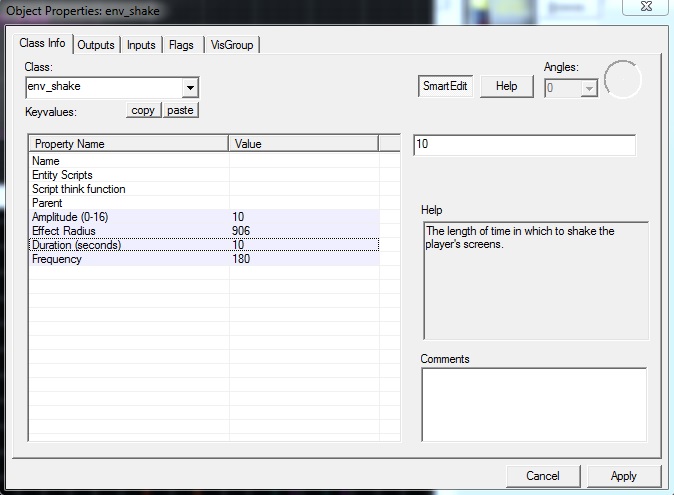
Attach these to button so that they can be triggered when used activates them. Compile and run the game.


env_steam (pipes)

steamicon

Select the Entity Tools and search for env_steam in the objects dropdownlist. Left click in the level to add it. Double click the Entity to display its properties.
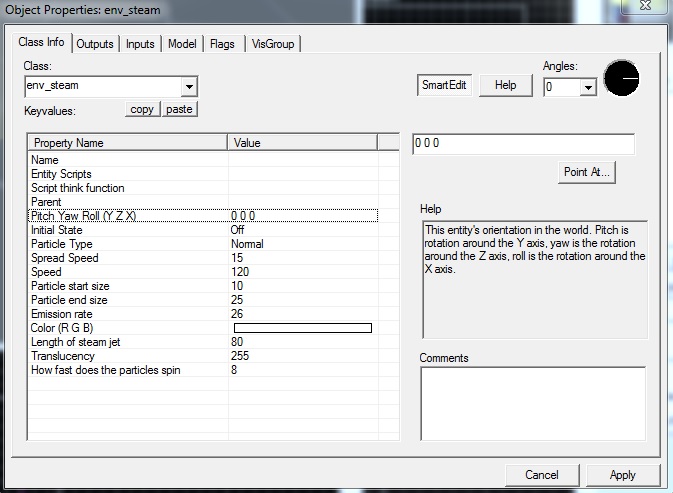
steamprop

Properties are;

  • Initial State – Option if starts enabled.
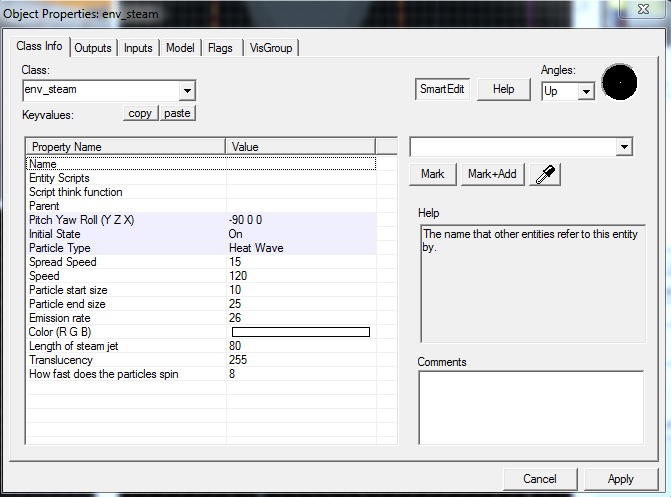
  • Particle Type – Steam effect type. There are two; normal or heatwave. Steam effect type,
  • Spread Speed -The amount of random spread in the particle’s velocity after they spawn.
  • Speed – The default speed at which the particles move after they spawn.
  • Particle Start Size – The initial size of the particles after they spawn.
  • Particle end Size – The size of the particles at the point at which they are removed.
  • Emission Rate – The rate of particle emission. i.e. particles per second.
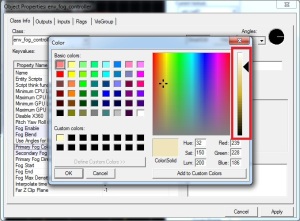
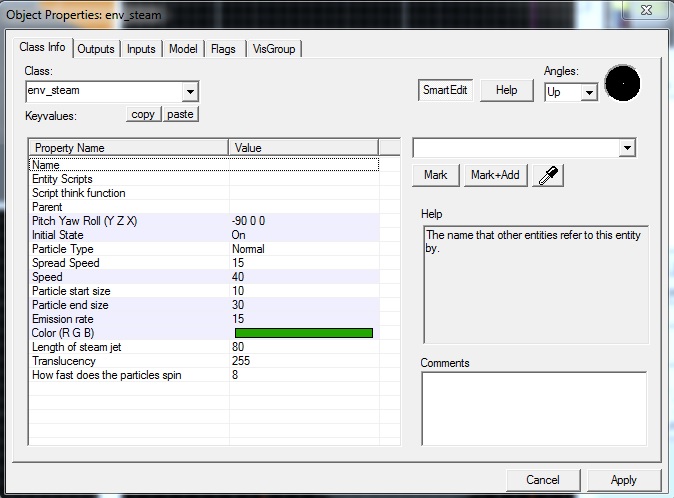
  • Color – Steam colour, only used if emissive flag is set.
  • Length of stream jet – The length of the jet determines the lifetime of each particle.
  • Translucency – Render alpha value.
  • Pitch Yaw Roll (X Y Z) – This entity’s orientation in the world.

Flag settings;

  • Emissive – Provides colour to the steam.

Will create three env_steam entities with different properties;

1- Initial state on, pointing up with Emissive setting selected to give white colour.

steam1

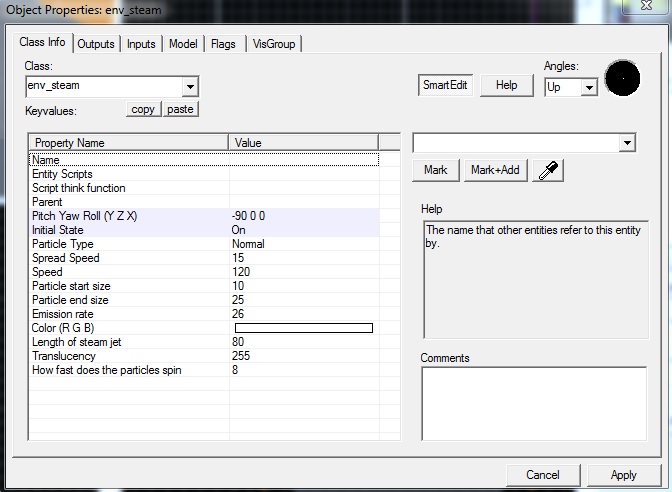
2- Initial state on, pointing up, particle speed 40, end size 30, 30 emission rate and coloured green (need to make sure Emissive is selected to activate the colour)

steam2

3- Initial state on, point up, but type is set to heatwave (It will not show steam but a heatwave)

steam3

Compile and run the game to view them in-game.
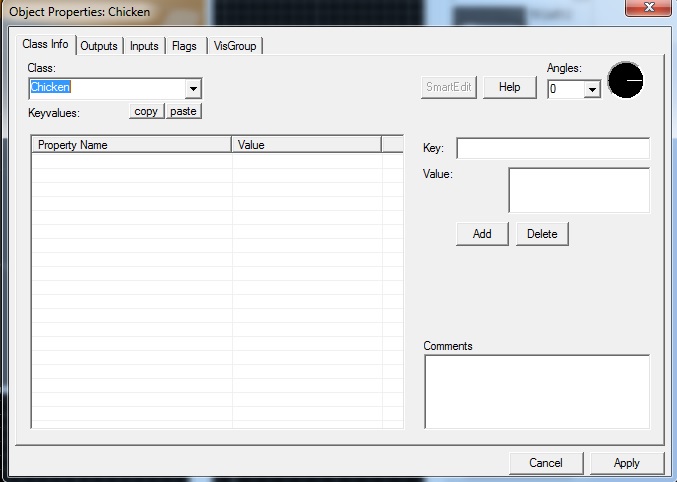
 

Chickens (bwak)

chicken1

This entity is very simple to add. Select the Entity Tools and add an entity to your level. Double click the entity to open its properties.  Type in the Class dropdownlist Chicken and hit enter. The entity should change to look like the image above. This entity has no properties.

chicken

Nothing else to do. Compile and run the map.


Video 

In this post I will teach you how to add and configure four env entities;

env_fire – is a point entity available in all Source games. It handles a single flame at its origin. The flame causes heat ‘damage’ to other env_fire entities around it, and will eventually ignite non-flaming env_fire entities nearby causing fire to spread.

env_explosion – is a point entity available in all Source games. It creates and exposition  at its origin. To create an invisible explication that moves objects that moves objects within a radius use env_phyexplosion.

env_spark – is a point entity available in all Source games. It is used to create sparks at its origin.

env_laser –  is a point entity available in all Source games. It creates a laser beam between itself and a given target.

env

Select the Entity tools and filter in the objects dropdownlist in the bottom right side of the hammer editor for the appropriate env entity. Left click in the world to add that entity. After you have added the entity double click the it to open it.

1- env_fire

env2

fire1

Properties are;

  • Duration – Amount of time the fire will burn.
  • Size – Height (in world units) of the flame.
  • Attack – Amount of time the fire takes to grow to full strength.
  • Type – Either Natural or Plasma. Natural is a general all purpose flame, like wood fire.
  • Damage Scale – Multiplier of the burn damage done by the flame.
  • Ignition Point – Amount of heat ‘damage’ to take before this flame should ignite.

As well as these properties you are able to set certain settings, they can be found under the Flag tab;

  • Infinite Duration – This will set the fire to have infinite duration (it will ignore the duration property).
  • Smokeless – It will remove smoke from the entity.
  • Start On – (Self explanatory) start on, no need for ignition points.
  • Start Full – Start with the fire
  • Don’t drop – (Not sure, never used it).
  • No glow – The fire entity will not give a glow (I recommend adding light entity for the glow).
  • Delete when out – When the fire is extinguished it will delete itself.
  • Visible from above –

Here are different fire types with different property values (R-L).

1- Standard fire, default properties with settings Start On and Start Full.

2- Lower flame, lowered the size of the flame to 10. Same settings (Start on and Start Full).

3- Standard fire. Attack set to 30 because the flame start on but not full. (Unable to notice, due its a picture)

2014-04-10_00001

If you plan on adding the fire entity on top of a prop,  then you need to make sure that prop is prop_static not prop_dynamic or prop_physics. (Left prop_dynamic and right prop_static).

2014-04-10_00002


2- env_explosion

env3

explosion

properties are;

  •  Magnitude – The amount of damage done by the explosion.
  • Radius Override – If specified, the radius in which the explosion damages entities, If unspecified, the radius will be based on the magnitude.
  • Fireball Sprite – Sprite of the fireball.
  • Render Mode – Render mode of the fireball. 0 Normal, 4 Solid, 5 Additive.
  • Ignored Entity – Do not harm or affect the named entity.

Setting for the entity can be found under the flag tab (all are self explanatory);

explosion1

This entity is better used when it is connected to a button or even to trigger the explosion.

3- env_spark

env4

spark

properties are;

  • Pitch Yaw Roll (X Y Z) – This entity’s orientation in the world.
  • Max Delay – The longest delay between sparks (in seconds).
  • Magnitude – The size of the sparks.
  • Spark Trail Length – Length of the spark trails.

Settings;

  •  Start On – Start when map loads
  • Glow – It gives off glow when there are sparks.
  • Silent – Sparks make no sound when on.
  • Directional – Spark go off in a certain direction provided by value in the Pitch Yaw Roll.

Here a few examples (R-L);

1- Default properties and with the Start on setting selected.

2- 5 second Max delay, with Glow and Start on setting selected.

3- 5 second Max delay, Large Magnitude,  medium Spark Trail Length and with Start on setting selected.

2014-04-10_00007


4- env_laser

This entity is different to the other env entities in this post, as it requires a target. You have two options when coming to add a target, you can use entity info_target or use a normal prop to be a target. I’ll show both cases.

laser

laser1

properties are;

  • Target of Laser -Name of entity, or entities, to strike at. The target is randomly chosen if there are multiple entities matching the given name.
  • Brightness - Beam brightness.
  • Beam Color  Beam color.
  • Width of Beam - The width of the laser beam, in pixels.
  • Amount of noise – The amount of noise in the beam. 0 is a perfectly straight beam.
  • Sprite Name - The material used to draw the laser beam.
  • End Sprite - If specified, this sprite will be drawn at the end of the laser beam.
  • Texture Scroll Rate – Rate at which the beam texture should scroll along the beam.
  • Starting Frame - The frame to start the beam texture on.
  • Damage / second - How much damage this laser does. per second. to things it hits.
  • Dissolve Type - Dissolve effect type.

Setting that env_spark has;

  • Start On – Start on when map is loaded.
  • Start Sparks – Sparks appear where the laser starts.
  • End Sparks –  Sparks appear where the laser ends (target).
  • Decal End – Where the laser ends decal is added on the surface of the object.

Examples;

1- Prop Target

So will start by making a prop as the target. You will need to add prop_dynamic, its the only prop entity that allows you to give it a name (prop_dynamic_override will do too).  Once you have selected the appropriate model and given the prop entity a name, add an env_laser entity and open its properties.

Here we will set a few different settings. First set the Target of Laser to the name of the prop. Also set the sprite of the laser. to do that select Sprite Name property and press the browse button to open the textures window. Unfortunately CS:GO SDK only has three types of sprites that fit with env_laser;

  • physbeam
  • laserbeam
  • purplelaser

Filter for one of them and double click it to select it. Leave all the other property values set to default. Lastly under flag tab select the Start On setting.

2- Using info_Target

Select the Entity Tool and use object dropdownlist to find ‘info_target’. Left click in the level to add it (reposition it if necessary). Open the info_target properties and give it a name. Now that is done go back to the env_laser and set the Target of Laser to be the info_target name. Leave all the other env_laser properties to default. Again go under the flag tab and select the Start on setting

Make sure in both cases you have Start On setting selected. It can be found under the Flag tab. If you dont have it select then it wont start (Unless you plan on using a trigger to activate it)

In-game

2014-04-10_00008


 Video:

I this post I will teach you how to use two make two things; Dust by using func_dustcloud and Fog by using env_fog_controller.

  • func_dustcloud is a brush entity available in all Source games. It spawns randomly-sized dust particles within its volume. Use the trigger texture with this entity.
  • env_fog_controller is a point entity available in all Source games. It determines the density of aerial fog for the whole map.

func_dushtcloud

To create a dustcloud we first need to select the correct texture, open up the Textures window by selecting the browse button, In Textures use the filter by adding ‘trigger’. Double click the trigger texture to select it.

buy1


Now that you have the trigger texture, we move on to creating the a brush. Select the Block Tools and create a template in the area you want the dustcloud to cover. When you have the right click the template and select Create Object or hit Enter.

dustcloud

Resize or reposition the brush if required.

We now need to tie the brush to an entity (func_dustcloud), so select the brush, right click the brush and select Tie to Entity or hit Ctrl + T. The Object properties will show, under the Class dropdownlist search for ‘func_dustcloud’ select it and hit apply.

dustcloud2

Properties you need to take into account are;

  • Name – The name that other entities refer to this entity by.
  • Particle Color – Color of the particles.
  • Start Disable – If set to Yes it will not then create particles when spawned.
  • Pericles per second – Number of particles to spawn, per second.
  • Maximum Particle Speed – Maximum speed that the particles can move after spawning.
  • Maximum Particle Lifetime – Maximum number of second until each particle dies.
  • Minimum Particle Lifetime – Minimum number of seconds until each particle dies.
  • Maximum Visible Distance – Maximum distance at which particles are visible. They fade to translucent at this distance.
  • Frozen – When set, this entity spawns the number of particles in SpawnRate immediately, and then goes inactive.
  • Maximum Particle Size – Maximum size the particles can be
  • Minimum Particle Size – Minimum size the particles can be

There is a lot to take in but the most important are;

  • Name (if you plan to start the cloud to be triggered by a button or event).
  •  Particle Color (To set the color depending on the enviroment).
  • Start Disabled (set to yes so that then you can enable it when there is an event).
  • Maximum Visible Distance (Make sure it is visible from a far).

So in the case of the his post I will duplicate the entity brush and set different properties. Properties I will change are the visible distance, colour and particle per second number.

Brush 1 – Green colour, greater particles per second, with maximum distance of 1024

dustcloud3

Brush 2 – Red, with 40 particles per second and maximum visible distance of 500

dustcloud4

Compile and run the game to see them in-game.

 2014-04-02_00002

2014-04-02_00001


env_fog_controller

To add fog into your level, select the Entity Tool and use Objects dropdownlist to search for env_fog_controller. Left click in the world to add the entity. Its position is not necessary (well it has to be inside the skybox).

fog

Double click the entity to open the object properties.

fog2


The properties that you need to take into account are;

  • Fog Enable – Enable fog on map load (This is important if you want fog in your level to show).
  • Primary Fog Color – Primary Fog Colour.
  • Secondary Fog Color – Secondary Fog Colour. (Primary will do, but you can set this if you want to use Fog Blend).
  • Fog Blend – This will enable blending between Primary fog colour and secondary fog colour, based on the direction the player is looking.
  • Fog Start – How far from the viewer the fog should start.
  • Fog End – How far from the viewer the scene should be completely fogged.

To set these setting you are required to go back and forth between the editor and game to get the perfect result. If you want a head start, then here are a few hints;

1 – Make sure that you have Fog Enable set to Yes.

2 – Selecting the fog Colour – You don’t want to colour to be left at default colour (which is white) or it will look like this in-game;

2014-04-03_00001

So what you want to do is open the light_environment properties and take the colour value from the brightness and set it as the fog Primary fog Colour.

fog4


Do the same with a Ambient and the Secondary Fog Colour. Make sure to set Fog Blend before you Compile and Run the game.

2014-04-03_00003


If you think the colours are still slightly briht, then go to the fog colour properties (primary and secondary) and make the colours slightly darker by hitting ‘Pick color‘ and using scroll on the right hand side.

fog5


3 –  Setting the Fog Start and End – Lowering the Fog Start value will bring the fog closer, while lowering the Fog End will bring the fog density closer.

With Low Fog Start

2014-04-03_00004

With Low Fog End

2014-04-03_00005


Setting these properties is dependent on the size of the map. If you have a big map then increase the Fog End value to around 3000 and leave the Fog Start at 500. While if the map is open (a lot of grass, only few buildings) then good idea to lower the Fog Start value to 100, and leave the Fog End at 2000.

Play about with the values to get the best result.