During the lighting post I did not give tutorial light_dynamic, and did not give tutorial for prop_physics during the prop post. The reason for this is require explaining props and lighting before giving tutorial as require abit of each when it comes to use them in CS:GO SDK. So I’ll give a tutorial on how to add physical ceiling light.
Previous Posts:
Physical Ceiling Light
Entities required are:
- light_dynamic.
- prop_physics.
- phys_ballsocket – It simulates a rigid connection between the centre of its constrained entities and its own location that prevents them from changing relative distance and makes their rotation point its own location.
- Building (Made up from brushes/walls).
- (optional) point_spotlight (for effect).
Step 1 – Building a Dark Room
We start by creating a dark room to add our light into to see the effect more clearly. Start by select a texture by selecting browse from the right side of the hammer editor to call the Textures window. Preferred a dark or a grey texture, up to you (I’ll be going with ‘metal/citadel_tilefloor016a’)
Now move on to the building. Select the Block Tool or [Shift + B] 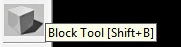 . Then make sure that Objects drop down list on the bottom right side of hammer editor is set to ‘Block’. Then create four big walls and a roof.
A fast way of making four walls is by duplicate a single wall into four, and turn two of the walls 90 degrees. To duplicate select the object/brush, drag the brush somewhere on the map and while hold shift, release the left mouse button.

To turn/rotate the object, right click the object/brush and select Transform and a small window will pop up. Make sure to Mode is set to Rotate and set the Z value to 90 then click OK.

Then all you have to do is connect together with no gaps and add a roof block. Should look like this from the inside;

Step 2 – Adding Physics light model
Select the entity tool, and filter for prop_physics and then left click on the roof block. In the prop entity properties under World Model select Browse button. Filter for ‘light’. While you have the info tab selected look for light model that is compatable with physics.

Once you have found one click OK on the Model Browser. Give the prop entity a name (e.g. light1) and then select apply in the properties. You may need to rearrange the position of the entity to fit the world.

Step 3 – Adding a phys_ballsocket
This is basically a connector, which is connecting physics object to the wall. Select the entity tools and filter in the bottom right side of hammer editor, in the objects drop down list for ‘phys_ballsocket’. Left click on the roof block to add the entity. Then rearrange position to be directly above the physics prop entity. like so;

Then enter phys_ballsocket properties. Then set the Entity 1 field value to equal the physics prop entity name, which you gave (e.g. light1)

Then select Apply.
Step 4 – Adding light_dynamic
Select the entity tool and filter for ‘light_dynamic’, then left click in the world to add the entity. Position it to be set under the light model entity and make sure that centre x marker of light_dynamic entity is not within parameters of the light model entity. Like so:

Once that is done we move on to setting the light_dynamic entity values. Go into its properties by double clicking the entity.

You will need to set the values of:
- Parent to equal the light model entity (in my example is light1).
- The inner and outer values to cover more surface area (60 for inner and 75 for outer is good)
- Brightness (requires some in-game testing to get the best value)
- Pitch Yawn Roll – 90 0 0 (Facing down)

Finally you need to set the Maximum Distance to view the affect light. To do this once you have selected the light_dynamic entity, you will notice a yellow circle in the side,front and top views or yellow sphere in the texture view. Select a white square from either the side or front view and stretch it until it inner and outer emission lights are within the sphere.

Now test it by running the map.
(Optional) Step 5 – Adding point_spotlight
Select the entity tool and filter for point_spotlight. Add it to the world by left clicking and position it in the same position as the light_dynamic entity. Within its properties set these values:
- Parent – light1.
- Spotlight length 100, keep the Spotlight With on 50.
- Pitch Yawn Roll – 90 0 0 (Make sure the spotlight is facing down)
In-game shots
 (Light emitting at me after being shot)
 (Light going in the other direction)


