In this post I will explain the reasons why I wont be buying Titanfall, which is set to be released for the PC, Xbox One and Xbox 360 this March.

Before starting, I would like to indicate that I did not buy Battlefield 4 or Call of Duty: Ghost, because I anticipated the problems that came with them when they were released. I will do a few comparison between Titanfall, Ghost/BF4 (using what information there is online) and Black Ops 2/BF3 (games that I have played).

So let me start with Content.

From reading the articles, playing the beta and watching videos of the game online, it appears that Titanfall will not have a great deal of content to keep me playing.

The game is mutiplayer only, but has singleplayer elements.  Following the same idea that was used in Brink, do you remember that game? Which was hyped to reasonable standard before release but unfortunately it did not live up to that hype.

While playing the beta I did not take notice of the singleplayer elements, as I was focusing on staying alive. This made me think of how many people will do the same thing? Think the story that someone spent great time working on will be wasted.

The beta only featured few amount of weapons, but yet again its a beta. Although there hasn’t been any information about the weapons in-game but from what I have seen and read  it looks like the game will only be having a few handful of weapons. Battlefield 3 in my option had a good number of weapons for players to select from. While Black Ops 2 had a reseasonable amount, good enough to last months.

As there will be no singleplayer, that then could mean more mutiplayer maps, right?. Well as I am writing this post I have discovered that there will be fourteen maps overall. The ones I played in the beta felt like a medium size map when I played as a pilot but felt small while in the Mechs. Compare the number of maps with other shooters (Not including DLC maps, just standard game copy maps) like Battlefield 4 which has ten maps (which are big but can be cut sort depending on the game mode) and COD:Ghost which has fourteen medium sized maps.

So by comparing three games; Battlefield 4, Ghost and Titanfall. You will notice that;

  • Battlefield 4 has Lots of Guns, 10 Maps (Ranging in size), Singleplayer and Co-op.
  • Call of Duty: Ghost has Good number of guns, 14 Maps (Medium size), Singleplayer and Extension (or Zombies if you’re a Treyarch supporter).
  • Titanfall will have a good number of guns, 14 Maps and three Mech/Titan types.

It does not look like you get much with Titanfall. So this then allows me to move on to the second reason.

Price

The cheapest place to buy Titanfall is from Amazon, at the cost of £34.99 ($58.45) for PC. While the most expensive place to buy Titanfall for PC is directly through Origin (EA’s failed Steam clone) and it will set you back £44.99 ($75.16).

When COD:Ghost and Battlefield 4 were released, they had the price tag of £34.99 on Amazon. With Battlefield 4 costing £44.99 on Origin and Ghost costing £39.99 on Steam.

So the reason here that I do not want to pay EA and Respawn £34.99 for a game that has less content than other games. I also do not want to pay them to forcing me to use Origin.

Support

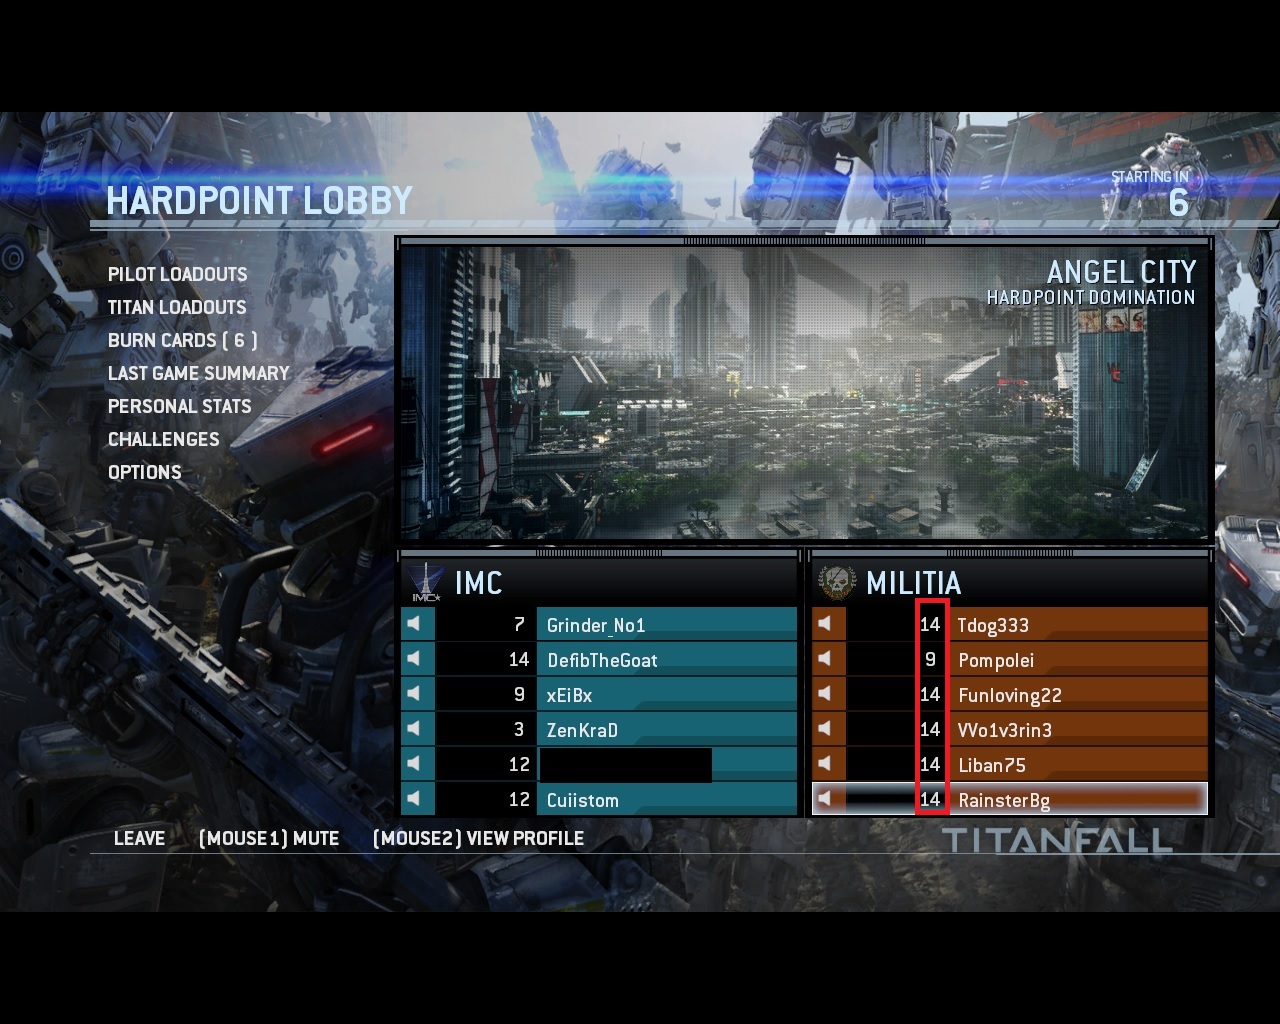
The final reason is support. I will not expect any. The game will have no dedicated servers as everything will be running on Cloud servers. So you are provided with Call of Duty: Modern Warfare 2 style of matchmaking, which give you random bans, increase of cheaters and lack of good games.

titanfall matchmaking fail

Studio co-founder revealed that Titanfall will not support mod and map tools at launch, but then again as the game will require Origin, so do not expect support even after launch. This shows that the game will have no future in growing, compared to other titles such as Counter Strike, Unreal Tournament and Quake, which to this day are still played by millions, due to the fact of the community support creating free content for players to play.

Beta Opinion

This is based on my opinion, others may differ.

Things that I did not like:

  • Matchmaking Sucks.
  • Everybody gets Mechs, its not earned.
  • AIs are useless.
  •  Hit Marker Latency/Not registering.
  • Climbing problems.
  • Some weapons are useless and others are overpowered.

Things that I did like:

  • Movement and wall running felt smooth.
  • Wildcard boosts also known as burn cards.
  • You always enjoy watching Mechs fall from the sky.

So to sum up Titanfall would be that it’s a over-hyped and overpriced game. This does not mean that game is not good, its just that you don’t really get much for your money. It’s a little pick me up that will only last couple of months before getting bombarded by DLC until Titanfall 2 announcement at E3 2016.

Titanfall MapsBattlefield 4 Maps , COD:Ghost Maps 

In this post will show you how to make Alarm Light, like this;

2014-02-01_00002

This post will also teach you how to create rotating brushes by tying the brush into an entity. For this you will require few things;

  1. Two prop_dynamic_overrides.
  2. Small brush (size of the prop) that has the Invisible texture applied to it.
  3. Two point_spotlights

Lets starts by adding the brush.  Select the browse button to open up the Textures window. Filter for ‘invisible’ and double click on it to select it. Create a small rectangle template (10 Width, 10 Length, 15 Height) and hit Enter to create the brush.

After yo have done that select the brush and hit Ctrl + T. This will open the object properties. Search for ‘func_rotating’ in the Class drop down list and hit Apply. In the properties there are few thing that will be required to change and set.

  • Set the name to alarm1
  • Set the Max Rotation Speed to 360
  • Under the Flag tab tick the Start On box
  • Under the Flag tab un-tick the Large Sound Radius

Now we move on to adding the props. Click the Entity Tool or Shift + E, and filter for prop_dynamic_override. Left-click in your level twice to add two. Select one of them and open up the properties. Under World Model select Browse to open the Model Browser. Filter for emergency and select emergency_lighta.mdl.

Select the other entity and do the same thing but instead select emergency_lightb.mdl. Also under the Skins tab and select the second skin (skin1). Then hit OK and then in properties set the parent to be the name of the rotating brush , and then hit apply.

p16

Make sure they are within each other;

ap1

Final part is the lighting. Select the Entity Tool or shift + E, and left click in your level. Open the entity properties and do these settings;

  • Set the parent to alarm1.
  • Change value of Spotlight length to 250.
  • Change the colour of the light to red.

ap2

Reposition the light close to entity and make it face the light represented in the entity. Also create a duplicate the light to face the other direction.

ap3

Compile and Run the game to view it in-game.

2014-02-01_00001

In this post I will teach you on how to add three different types of breakable windows which are provided in Counter Strike: Global Offensive hammer editor.

The types are:

  1. Breakable Brush Window.
  2. Breakable surf Brush Window (like in CS_Office).
  3. Prop Window.

Before starting, recommend creating space to add window. Like so;

w1

Prop Window

We will start with the easier one. This will simply require two entity types. A prop_physics_multiplayer and four phys_ballsocket.

Select the Entity Tool or Shift + E, then filter in through the dropdown list for prop_physics_multiplayer. Left click in your level to add. Now that you have added a prop_physics_multiplayer you will need to set the world model. Double click the entity to open the properties. Under World Model select Browse to open the Model Browser. Filter for ‘window’. Under the info tab search for model that allows physics properties. (I’m going with window_industrial.mdl). once you have found it select OK, then give the entity a name (e.g. wind1)  and hit Apply.

Resize the brushes to fit your window

w2

Now that you have window inserted, you will need to attach it to the brushes around it so it wont fall off. That is where you will need the four phys_ballsocket. Select the entity tool and filter for ‘phys_ballsocket’ and place one on the top, bottom, left and right side of window. Like so;

w3

Enter select them all and open their properties. You will need to set the Entity 1 to the name of the window (which I choose to be wind1)

w4

Compile and run the game to test it.

Breakable and Breakable_Surf Brush Window

For this we need to create a brush that will be in the centre and them tie that brush into an entity. So select the browse button from right side of the editor to open the Texture window. Filter for ‘nodraw’ and double click the texture to select it.

Now that you have the texture, select the Block Tool or Shift + B, and create a template within the other brushes (window). I recommend it to be 2-4 units thick and as high as you want. Then right click and select create object or hit Enter.

w5

Now you have two choices;

  • func_breakable
  • func_breakable_Surf, like the windows in CS_Office which break into small crystals.

You require to add glass to the brush (window), do this by opening the Face Edit Sheet by selecting the Toggle texture Application or Shift + A. Then select the browse button to open the Textures window. Filter for ‘glass’

There are one glass texture that will work with func_breakable_surf. There are also few textures that do not allow the brush to break. This image shows you which work with what, choose carefully;

w6

  • Red – Wont work with any breakable brush.
  • Green – Only works with func_breakable.
  • Purple – Works with func_breakable and func_breakable_surf.

func_breakable

Once you have selected the glass texture, apply it on both sides of the brush (window). I recommend setting the texture to fit or centre the brush. Then select the window brush and hit Crtl + T to open the object properties window. Search for func_breakable under the class drop down list, then hit apply.

func_breakable_Surf

While for func_breakable_surf, apply the glass texture to only one side of the brush (window) leaving the other side to have nodraw. Select the brush and hit Ctrl+T to open the object properties window. Search for func_breakable_surf under the class drop down list and then hit apply.

On one side of window brushes difference between breakable and breakable_surf.

w7


Compile and run the game to see the affects.

Extra Information

Here are few things you can change within the window brush properties;

  • Parent – To attach it moving objects
  • Material Type – Could change the material type to something else when it breaks.
  • Health/Strength – Is the amount of damage brush can take before it breaks.

Today’s post will be a very simple and short one, in which I will teach you how to add water into your CS:GO level. I will also post images of the different water textures provided with the hammer editor.

Water

Lets Start first be creating a brush that will have the No Draw texture applied to it. So select the browse button front the right side of the hammer editor to open up the Textures window. Filter for ‘nodraw’ and double click the texture to select it. You should have this;

nodraw

Then create a brush by selecting the Block Tools to create a template of the brush. Right click and select create object, or press Enter. Resize and reposition if required until you have something like this;

nodraw2

Then I recommend adding brushes around the nodraw texture (which will be our water) to make it a tub. These brushes should have a different texture (your choice) and higher that the nodraw texture. Like so;

nodraw3

Now we come to turning the no draw brush into water. To do this open the Face Edit Sheet window by selecting the Toggle Texture or Shift + A. Select the browse button to open up the textures window, and filter for ‘water’. Select one of the textures that are within the red rectangle. (ones that have dev/ or liquid/)

water

One you have one selected right click on the upper surface to apply.

water3

Compile and run the game to see the effect.

Different Waters in-game

dev/dev_water2

2014-01-30_00001

dev/dev_water2_cheap

2014-01-30_00002

dev/dev_water3

2014-01-30_00003

dev/dev_water3_beneath

2014-01-30_00004

dev/dev_water3_exp

2014-01-30_00005

dev/dev_water4

2014-01-30_00006

dev/dev_water5

2014-01-30_00007

dev/dev_waterbeneath2

2014-01-30_00008

liquid/aztecwater

2014-01-30_00009

liquid/bathhouse_water

2014-01-30_00010

liquid/inferno_water

2014-01-30_00011

liquid/shack_water

2014-01-30_00012

water_lod_control

When using water in the level, it is required to add a water_lod_control entity. water_lod_control is a point entity. It is used to control the level of detail behaviour of any water in the map.

To add this, select the Entity Tool or Shift + E. Then filter for ‘water_lod_control’. Left click on the water to add it. Reposition it so that half of the entity is within the water. Finished, compile and run the game.

Image  —  Posted: January 31, 2014 in CS:GO SDK Features
Tags: , , , , , , , , ,

In this post I will teach you how to add a weather effects into CS:GO maps. Its is very simple to do, but it does require some knowledge of how they would turn out in-game.

To add weather we will need to create a brush, which will have trigger texture applied to it. So first we select the trigger texture by selecting the Browse button located in the right side of the Hammer Editor. A Textures window will pop up, filter for ‘trigger’. Double click the texture to select it.

buy1

Create a brush by selecting the Block Tools or Shift + B. Left click and great template covering the area where you want the brush to be. Reposition the brush if required by dragging the brush with the mouse. Once you have in the correct spot right click and select Create Object (or Hit Enter).

weather1

Now what we need to do is tie the brush to entity. We do this by selecting the entity and hit Crtl+T, which will open the Object Properties. We need to change the class from ‘func_detail’ to ‘func_precipitation’. Then hit apply to set it.

weather2

Now that you have done that we are able to select the weather required. func_precipitation provides few different precipitation types.

weather3

Particle Rain will provide you with what is says Rain. (Unfortunately Rain does not work for unidentified reason so select Particle Rain if you plan to add any rain to your level)

2014-01-23_00005

Snowfall and Particle Snow will provide you with snow. You can select either, the only difference is that Particle Snow falls faster and more dense . (Snow also does not work for unidentified reason)

Snowfall

2014-01-23_00001

Particle Snow

2014-01-23_00003


Ash will provide you with ash fall. (Not sure if you can see in the image but it does work)

2014-01-23_00008


Then you have Particle Rainstorm. Unfortunately rainstorm only work in the area where is covered by the brush, no so if you standing outside the area.

Outside Area

2014-01-23_00007

Inside Area

2014-01-23_00006


Extra

There is things to know when adding weather into the game, example how they would react with other brushes. So I have decided to make small building and test them out.

weather6


What I have found out is that Particle Rain is blocked by other brushes/walls compared to Snowfall, Particle Snow, Ash and Rainstorm, as they just pass through.

Rain

2014-01-24_00003

Snow

2014-01-24_00002

Ash

2014-01-24_00001


So if you do not want snow or ash to pass through then I would recommend splitting the precipitation brush into smaller brush that would surround the building. Like so;

weather 7


In this post I will teach you how to add different set of doors. Doors do require some in-game testing so you can get them right.

CS:GO SDK has two options for doors. Adding doors either by;

  • Models/Props (Using door models that are provided with the game)
  • Tying brushes to a door entity. (If you want a sliding doors or door with particular texture)

Using models is the easiest way of adding doors, just add prop_door_rotating entity. While brushes you will need to tie it to an entity but its more practical.

Adding Doors (Model/Prop)

Select the Entity Tool and search in the object drop down list (located in the bottom right of the hammer editor) for prop_door_rotating. Left-click in the world to add, it should add a purple cube.

door1

Now double click the entity to open the properties window.

door2

Select the World Model field and then click the browse button to open the Model Browser. Filter for ‘door’ and select the appropriate door. In the case of this tutorial I am going to select the doormain01_static.mdl model.

door3

Once you have found a model, hit OK on the model browser and then select apply. The model should display in the world, reposition it if required.

Adding Doors(Brushes)

To do this you will first be required to make a brush. Select a reasonable texture (I’d go with a dev texture) and create a brush that is 2 units wide, 55 units long and 104 units high. (Use prop door model to get the measurements)

door4

Now that you have a brush, you will want to add a door texture. Select Toggle Texture Application or Shift+A to open Face Edit Sheet. Click Browse button to open the textures window. Search for ‘Door’ and select a texture and apply it to the brush by right clicking on the brush surface (align the texture if required by using justify or measurements features) .

door5

Once that is done, we move on to tying the brush to an entity. There are two options;

Normal Rotating Doors – You can tie it to work like normal rotating door by selecting the brush and hitting Crtl+T to open the object properties. Then from the class drop down list search for func_door_rotating, hit apply and you will notice a purple sphere show on the brush/door.

door6

The sphere represents the rotation point of where the door will rotate around. So you are required to move the point(sphere) to the edge of the brush. Use the top viewport to move the sphere.

door7

Sliding Doors – If you want to create a sliding door (e.g elevator door or spaceship door) then you need to Tie the brush to func_door entity. To do that select your brush and hit Ctrl+T. This will open the object properties. Search under the class drop down list for ‘func_door’, once found hit apply.

door8

To make the door slide you will need to set the Move Direction (Pitch Yaw Roll) field. This will require some in-game testing to figure out which direction you want the door to moves when you use action key. You can use measurer located on the top right of properties window to set the direction.

door9

We are  done once you have figured out the direction.

Extra

There are few fields and states that you would like to experiment with when using doors. Here are few:

  • Under Class Info Tab;
    • Parent – The name of this entity’s parent in the movement hierarchy. Entities with parents move with their parent.
    • Speed – The speed at which the door moves.
    • Spawn Position – set if the door is open or closed when it at the start.
    • Unlocked Sound & Locked Sound – Set them to play a sound to give indication if the door is locked or unlocked.
    • Health/Strength – Allows the door to become breakable.
  • Under Flags Tab;
    • Starts Open – This door spawns open.
    • Non-solid to Player – The player does not collide with this door.
    • Passable – Nothing collides with this door.
    • Toggle – The door is given an input to change this door between open and shut.
    • Use Opens and Use closes – The +use key, when in range, triggers this door.
    • NPCs Can’t – NPCs can’t open this door.
    • Touch Opens – When a player or NPC collides with this door, it is triggered.
    • Starts locked – This door spawns locked and cannot be opened by the player or NPC (but buttons can still trigger it)
    • Door Silent – This door makes no noise  (No sound, and does not alert NPCs).
    • Ignore player +USE – Makes the door ignore players +use
    • Start Unbreakable – Makes the door breakable. (Only works on certain prop models and requires door having health/strength)


In this post I will teach you on how to add hostage rescue zones and hostages to your map. Will also add overlay/decal to define the rescue zones to make is easier to identify the area.

Updated hostage rescue rules allow to display only two hostages per map and you will need only one hostage to be rescued.

Adding Hostages

To add a hostage to the game, select the Entity Tool and search through object drop down list (bottom right side of hammer editor) for either;

  • info_hostage_spawn
  • hostage_entity

Both of them look the same and work the same way.

h2

As you are allowed two hostages per map, I recommend adding up to six, with each hostage entity is set at a different position on the map. The game will automatically select two at random when the match starts.

You can add hostages to an exclusion group that will allow you to define which hostage entities you do not want to spawn together. To do this select the hostages what you do not want to spawn together as a group. Open their properties by double clicking on one of the hostages or right click and selecting properties. Then set the Hostage Spawn Exclusion Group set to ‘Do not spawn together’. Here is example from a map that I have made;

h1

Adding Rescue Zone

Now we move on to adding rescue zone to allow CT players to bring hostages back to. Rescue zones are very simple to do.

We start by adding overlay/decal to identify the area where rescue zone will be. This is done by selecting Apply Overlays or Shift + O, then selecting a overlay by clicking the Browse button to open the Textures window. Search for ‘decals/militiahostagerescue

h3

To apply overlay/decal, left click mouse button on floor brush too apply.

Now we move on to the adding the rescue zone. You will need a brush that will have trigger texture applied to it. So start by selecting the trigger texture by selecting Browse button to open the textures window and search for ‘trigger’.

buy1

Now we create the brush by selecting Block Tool and build the brush that covers the rescue zone decal. Here is an example the map that I built:

h4

Tie the rescue zone brush to entity by right clicking and selecting ‘Tie to entity’ or hitting Ctrl+T. This will open up object properties. Under class drop down list search for ‘func_hostage_rescue’ and hit apply.

h5

Finished. Add Counter Terrorist player entity, compile and run the game to test it.

In-game

2014-01-05_00001 2014-01-05_00002 2014-01-05_00003 2014-01-05_00004

In this post I will teach you how to create bomb sites for CS:GO. These sites will be similar to the ones that are on maps that are provided with the game. Maps such as; de_aztec, de_dust and de_inferno.

Each bomb defusal map should hold two bomb sites; A & B. The first site you make will automatically be assigned as bomb size A. The second bombsite will be automatically assigned as bomb site B.

To set the bombsites you will need two brushes that will have the trigger texture and these brushes will also be required to be tied to an entity ‘func_bomb_target’.

So we start by adding overlay/decal to identify the bomb areas on the map. To do this by clicking the Browse button to open the Texture window and we search for reasonable target decal. Here are a few:

  • ‘bombsite_a’ or ‘bombsite_b’
  • ‘bombsite_letter_a’ or ‘bombsite_letter_b’
  • ‘bombsite_x’

After you have selected a decal/overlay, you will now need to place it on a brush.

To add the decal/overlay select the Apply Overlays overlay or Shift+O, then left click on the surface of the brush to apply it.

overlay2

Now we move on to adding the bomb zone brush, to do this we first click on the browse button to open the Texture window. Use filer by typing ‘trigger’ and select the texture that should look like this;

buy1

Once the texture has been selected, you will then need to create a brush. Select the Block Tool and create a brush that covers an area that you would want to be the bomb target.

bombsite1

Once you have done that we then move on to tying the brush to entity. You can do this by right clicking the brush from front,side or top views and select tie to entity, or simply selecting the brush and hitting Ctrl+T.

The brushes object properties will show up. In the Class drop down list search for ‘func_bomb_target’, then hit apply and you are done.

bombsite2

As I said at the start, the game mode will require you to create two bomb sites. You can simply duplicate the existing brush by selecting the brush, and while holding down the left mouse button drag it to the second target zone, then hold down the shift button and release the left mouse button. It should then create a duplicate brush.

bombsite3

Finally just add a terrorist player entity into the level and then compile and run the game to test the bomb sites. The overlay/decal will make it easier to identify the areas in-game.

In this post I will show you how to create spawn points for Counter Terrorist and Terrorist units. I’ll also include creating weapon buy zones for each side. I’ll also show you the best way to run the map.

Spawn Players

There are two ways of adding spawn points into map; either individually or as a bulk (5 players) by using func_instance.

We will start by adding them individually. To do this you will need to select the entity tool or [Shift+E], then filter for either;

  • ‘info_player_terrorist’ for Terrorists (This is set as a default for the entity tool)
  • ‘info_player_counterterrorist’ for Counter Terrorists

In the right bottom side of hammer editor, in the Objects drop down list.

Once you have picked on, then you will need left-click in the textured view somewhere in the word to add the entity. You may need to rotate the player start to make sure that when the player spawns, they will face the direction you want them to. Most maps and modes allow up to five player entities per side/team. You could add more that five but only five will show in-game.

spawn1

Now we go on to adding players in a bulk. Select the entity tool and filter for func_instance’. Once you have added the entity to where you want players to spawn, enter the func_instance entity properties. In VMF Filename field select the Browse button.

spawn2

A dialogue window will pop up and will displaying the contents of the maps folder. There will be folder by name ‘instances’, double click the folder. Within the instances folder there should be two vmf files; spawn_t.vmf and spawn_ct.vmf. Selecting spawn_t will give you five terrorists player entities, while spawn_ct will give give counter terrorists player entities. Select spawn_t.vmf as we already added five CT players. Then click apply.

You will notice that five T players show hovering over func_instance entity. Last things left to do is to rotate the entity to allow the players to face the right direction and make sure that entity is touching the floor of the world.

spawn3

Player Buy Zones

Now we move on to Buy Zones. You will need buy zones for each team to allow players purchase weapons and gear. Buy zones are very simple to set up.

To create a Buy zone you will need to create a brush/block with the ‘trigger’ texture. Select the Block Tools or [Shift+B]. Then select browse from the right side of the editor to open the Textures window. Filter for ‘Trigger’ and select it. Texture should look like this;

buy1

Create block that holds the entity players within the block/brush

buy2

To turn the brushes to buy zones, you need to select one of the brushes and then hit [Ctrl+T] (or right click the brush on side,front or top view and select Tie to entity). A properties window will show;

buy3

Then you need to turn Class to ‘func_buyzone’ and then hit apply.

buy4

Now depending on the brush covering which team, change the field value for Team Number (int) to the team the brush covers. In this case I have selected the brush covering the terrorist team, so I set Team Number (int) to Terrorist.

buy5

Do the same for the other team but have field value to Counter-Terrorist and hit apply.

Running the Map

To start running map, select Run Map counter strike 1.42  located at the top of the hammer editor or hit F9 on your keyboard. A window will open looking like this;

runmap

  • BSP –  BSP tool is the one that actually converts the .vmf file data into a usable .bsp file that the game engine can load.
  • VIS – This tool creates the visibility matrix for the map based on the level’s geometry. This matrix is what determines which polygons the player can see, might see, and can’t see from any given point within the level in game.
  • RAD – The RAD tool, or Radiosity tool, is responsible for generating and applying all lighting effects in a level.

I wont go into different options, just set the setting on Run Map window to be same as shown on the image above. If you run map on these setting, you will need to make sure to add skybox and light_environment before running map.


In-game Images

2013-12-26_00001 

2013-12-26_00002

During the lighting post I did not give tutorial light_dynamic, and did not give tutorial for prop_physics during the prop post. The reason for this is require explaining props and lighting before giving tutorial as require abit of each when it comes to use them in CS:GO SDK. So I’ll give a tutorial on how to add physical ceiling light.

Previous Posts:

Physical Ceiling Light

Entities required are:

  • light_dynamic.
  • prop_physics.
  • phys_ballsocket – It simulates a rigid connection between the centre of its constrained entities and its own location that prevents them from changing relative distance and makes their rotation point its own location.
  • Building (Made up from brushes/walls).
  • (optional) point_spotlight (for effect).

Step 1 – Building a Dark Room

We start by creating a dark room to add our light into to see the effect more clearly. Start by select a texture by selecting browse from the right side of the hammer editor to call the Textures window. Preferred a dark or a grey texture, up to you (I’ll be going with ‘metal/citadel_tilefloor016a’)

darktext

Now move on to the building. Select the Block Tool or [Shift + B] blocktool. Then make sure that Objects drop down list on the bottom right side of hammer editor is set to ‘Block’. Then create four big walls and a roof.

A fast way of making four walls is by duplicate a single wall into four, and turn two of the walls 90 degrees. To duplicate select the object/brush, drag the brush somewhere on the map and while hold shift, release the left mouse button.
duplicate

To turn/rotate the object, right click the object/brush and select Transform and a small window will pop up. Make sure to Mode is set to Rotate and set the Z value to 90 then click OK.

rotate

Then all you have to do is connect together with no gaps and add a roof block. Should look like this from the inside;

building

Step 2 – Adding Physics light model

Select the entity tool, and filter for prop_physics and then left click on the roof block. In the prop entity properties under World Model select Browse button. Filter for ‘light’. While you have the info tab selected look for light model that is compatable with physics.

physics

Once you have found one click OK on the Model Browser. Give the prop entity a name (e.g. light1) and then select apply in the properties. You may need to rearrange the position of the entity to fit the world.

light

Step 3 – Adding a phys_ballsocket 

This is basically a connector, which is connecting physics object to the wall. Select the entity tools and filter in the bottom right side of hammer editor, in the objects drop down list for ‘phys_ballsocket’. Left click on the roof block to add the entity. Then rearrange position to be directly above the physics prop entity. like so;

socket

Then enter phys_ballsocket properties. Then set the Entity 1 field value to equal the physics prop entity name, which you gave (e.g. light1)

ballsocket

Then select Apply.

Step 4 – Adding light_dynamic

Select the entity tool and filter for ‘light_dynamic’, then left click in the world to add the entity. Position it to be set under the light model entity and make sure that centre x marker of light_dynamic entity is not within parameters of the light model entity. Like so:

lightdyn

Once that is done we move on to setting the light_dynamic entity values. Go into its properties by double clicking the entity.

properties

You will need to set the values of:

  • Parent to equal the light model entity (in my example is light1).
  • The inner and outer values to cover more surface area (60 for inner and 75 for outer is good)
  • Brightness (requires some in-game testing to get the best value)
  • Pitch Yawn Roll – 90 0 0 (Facing down)

properties2

Finally you need to set the Maximum Distance to view the affect light. To do this once you have selected the light_dynamic entity, you will notice a yellow circle in the side,front and top views or yellow sphere in the texture view. Select a white square from either the side or front view and stretch it until it inner and outer  emission lights are within the sphere.

maximum distance

Now test it by running the map.

(Optional) Step 5 – Adding point_spotlight

Select the entity tool and filter for point_spotlight. Add it to the world by left clicking and position it in the same position as the light_dynamic entity. Within its properties set these values:

  • Parent – light1.
  • Spotlight length 100, keep the Spotlight With on 50.
  • Pitch Yawn Roll – 90 0 0 (Make sure the spotlight is facing down)

In-game shots

2013-12-19_00001(Light emitting at me after being shot)

2013-12-19_00002(Light going in the other direction)